
AI Tool: Save Customer Attachments to Lead Profiles
The Store Attachment AI tool saves a document, image, or video that a customer sends in chat into a file field on that customer's lead profile.
For example, a recruitment AI Employee can save a candidate's resume into a Resume field. A sales AI Employee can save an identity document or payment receipt into the correct lead record. Your team can then find the file from the lead profile without searching through the conversation.
Before You Start
You need:
- An AI Employee connected to a messaging channel
- Permission to manage the AI Employee and custom fields
- At least one custom field with the type File
The tool supports documents, images, and videos received in the conversation. Voice messages and audio files are not saved by this tool.
Step 1: Create a File Field
- Go to Settings.
- Open Custom Fields.
- Click Add Custom Field.
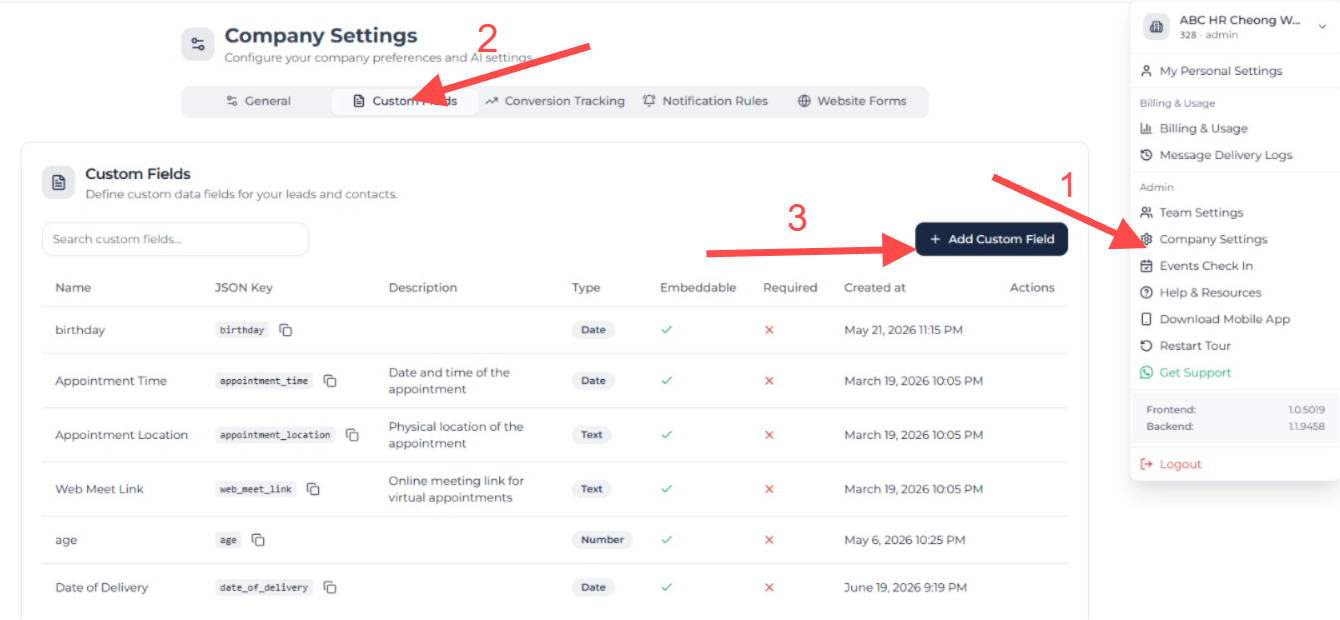
Company Settings Custom Fields page with Company Settings, Custom Fields, and Add Custom Field highlighted
- Enter a clear name such as Resume, Identity Document, or Payment Receipt.
- Select File as the field type.
- Save the field.
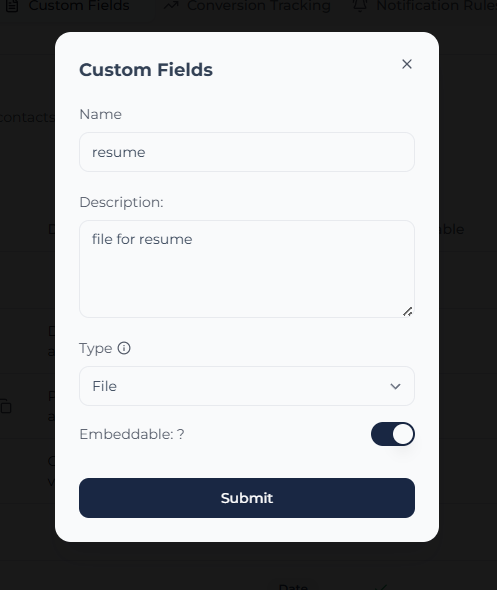
Custom Fields form with a File type field for storing resumes
You can also create a File field directly while setting up the Store Attachment tool if no File fields exist yet.
Step 2: Add the Store Attachment Tool
- Open the AI Employee you want to configure.
- Go to AI Tools.
- Click Add Tool.
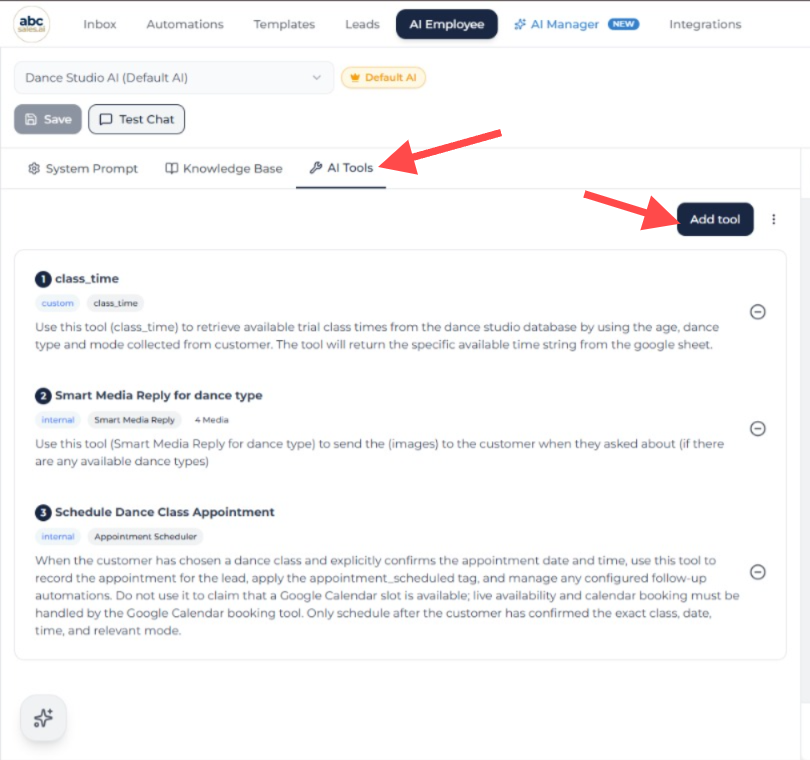
AI Employee AI Tools tab with the Add tool button highlighted
- Select Store Attachment.
- Give the tool a specific name, such as Save Candidate Resume or Save Payment Receipt.
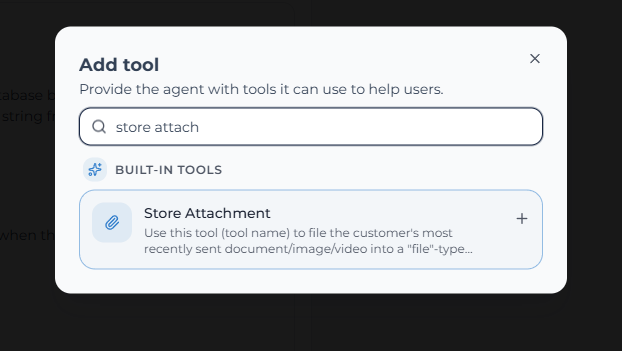
Add tool dialog with Store Attachment selected
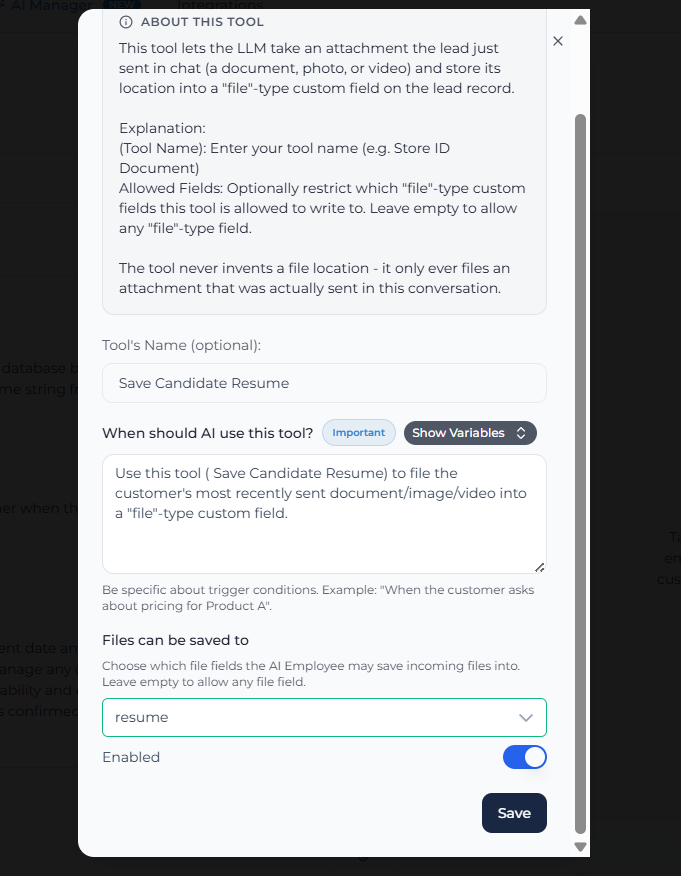
Store Attachment tool configuration with the tool name, instruction, allowed file field, enabled toggle, and Save button
Step 3: Choose Where Files Can Be Saved
Under Files can be saved to, select the File fields this tool may use.
- Select one or more fields when the tool should only save to those locations.
- Leave the selection empty to allow the tool to use any File field in your account.
For better control, choose only the fields needed for this AI Employee.
Step 4: Write the Tool Description
In the tool settings, add a clear description that explains when the AI should use this tool. State which customer file should be saved and which field should receive it.
Example:
When a candidate sends a resume, use the Save Candidate Resume tool to save it in the Resume file field. If the Resume field already contains a different file, ask the candidate for confirmation before replacing it.
Save the tool after updating the description.
Step 5: Add Instructions to Your System Prompt
Critical step: you must paste the tool description into your system prompt to tell the AI when to execute this action.
- Go to your System Prompt settings.
- Add instructions that tell the AI when to use the tool.
Example system prompt:
Step 1. Ask candidate for resume.
Step 2. When a candidate sends a resume, use the Save Candidate Resume tool to save it in the Resume file field. If the Resume field already contains a different file, ask the candidate for confirmation before replacing it.
Save the AI Employee after updating the system prompt.
Step 6: Test the Tool
- Send a document, image, or video to the AI Employee through a connected messaging channel.
- Use a message that makes the purpose clear, such as "Here is my resume."
- Wait for the AI Employee to process the message.
- Open the customer's lead profile.
- Confirm that the correct File field shows the uploaded file and that the file opens successfully.
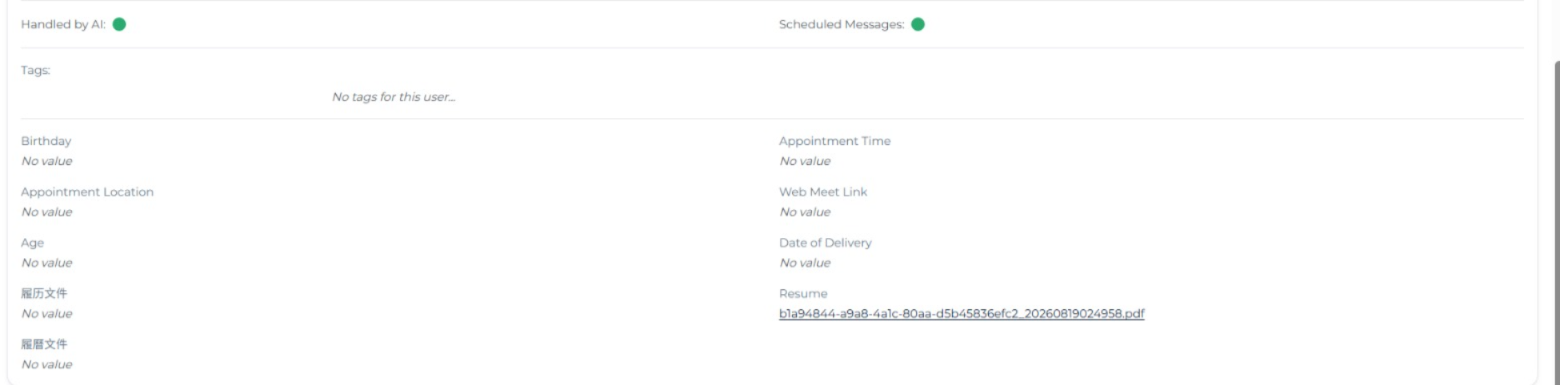
Lead profile showing a saved Resume file in a File custom field
If the customer sends several files together, the AI Employee will identify the correct file before saving it.
Replacing an Existing File
The tool will not silently replace a different file already stored in the field. The AI Employee must ask the customer to confirm the replacement first. After the customer confirms, the tool can replace the old file.
Sending or processing the same file again does not create another copy in the field.