
Connect Your WhatsApp Cloud API Number to a Facebook Page
To run Click-to-WhatsApp ads, your WhatsApp Cloud API number must be linked to your Facebook Page. This guide walks you through the latest Meta UI flow: linking the number, approving the connection, and setting up your first WhatsApp ads campaign.
Prerequisites
- Admin access: you must have "Full control" (Admin) permissions for the Meta Business Portfolio that owns both the Facebook Page and the associated WhatsApp Business Account
Part 1: Link Your WhatsApp Number to Your Facebook Page
Step 1: Log In as the Page
Make sure you are logged in to Facebook as your Page, not just your personal profile. You might need to switch profiles. This ensures Meta automatically recognizes your connected Business Manager and WhatsApp number.
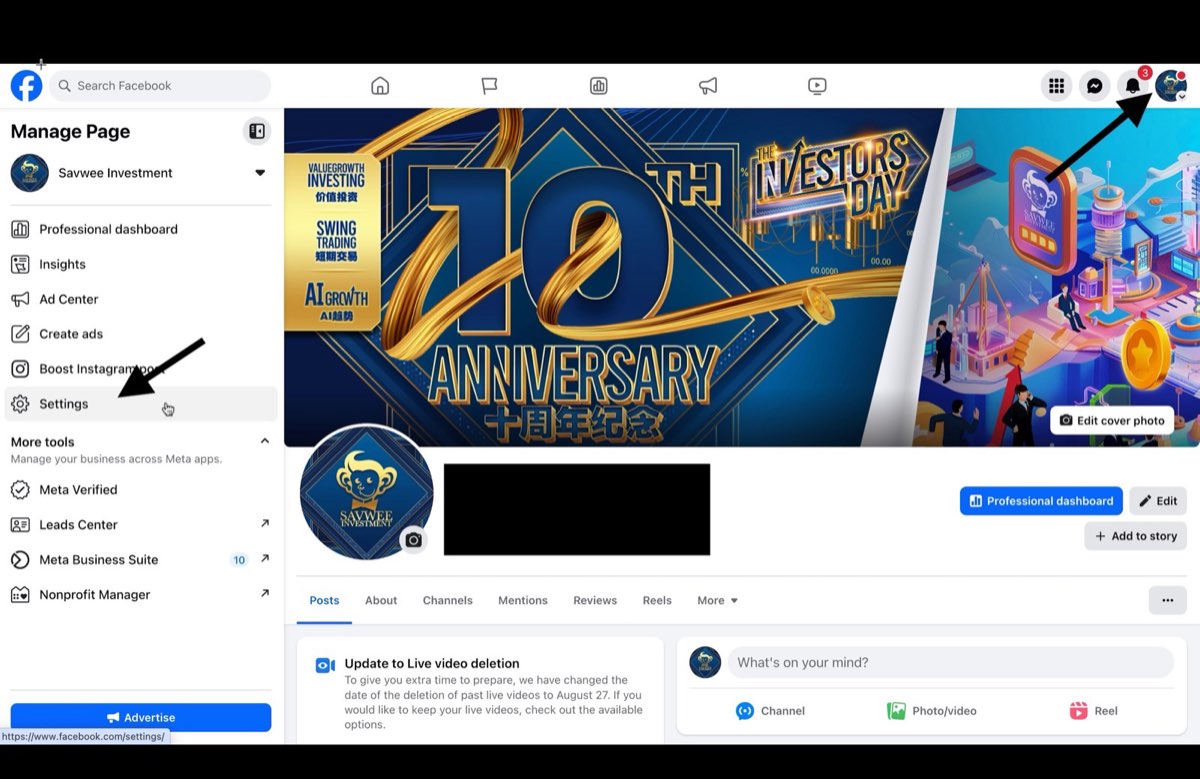
Logged in as the Facebook Page with the Settings menu open
Step 2: Open Page Details
From the left sidebar, go to Settings > Page details.
You can also jump straight to the linked WhatsApp settings at https://www.facebook.com/settings/?tab=linked_whatsapp.
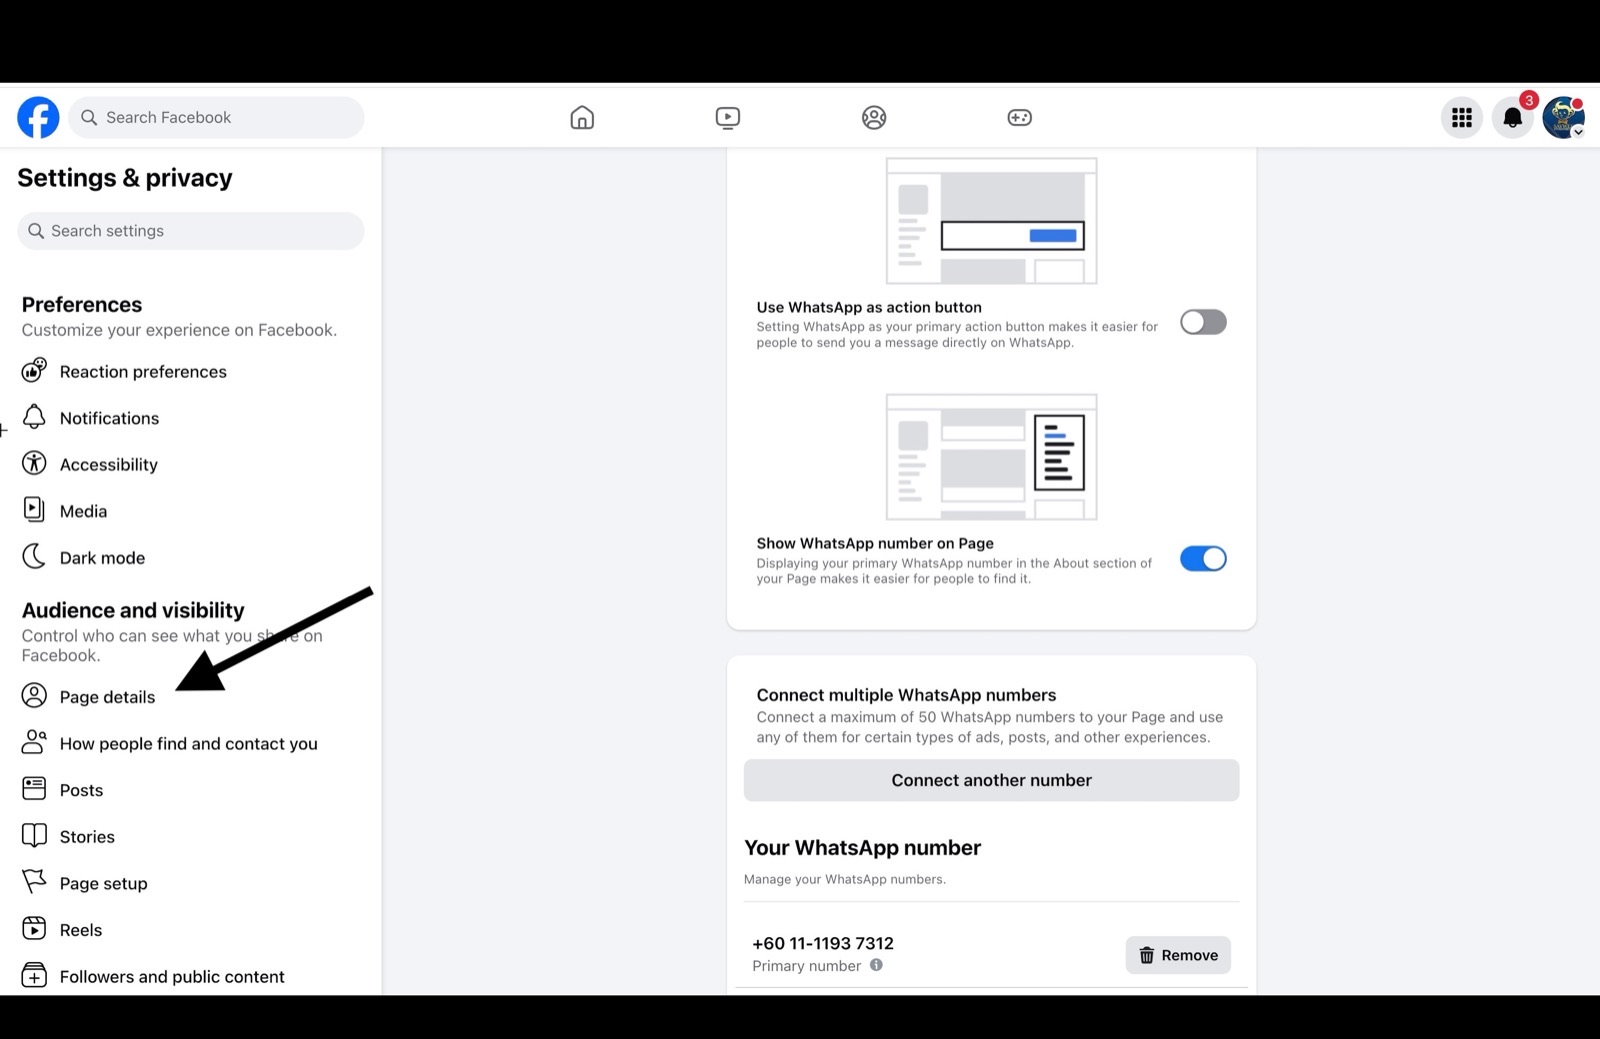
Page details option in the Facebook Page settings sidebar
Step 3: Add Your WhatsApp Number
Click Add WhatsApp number under the Contact info section.
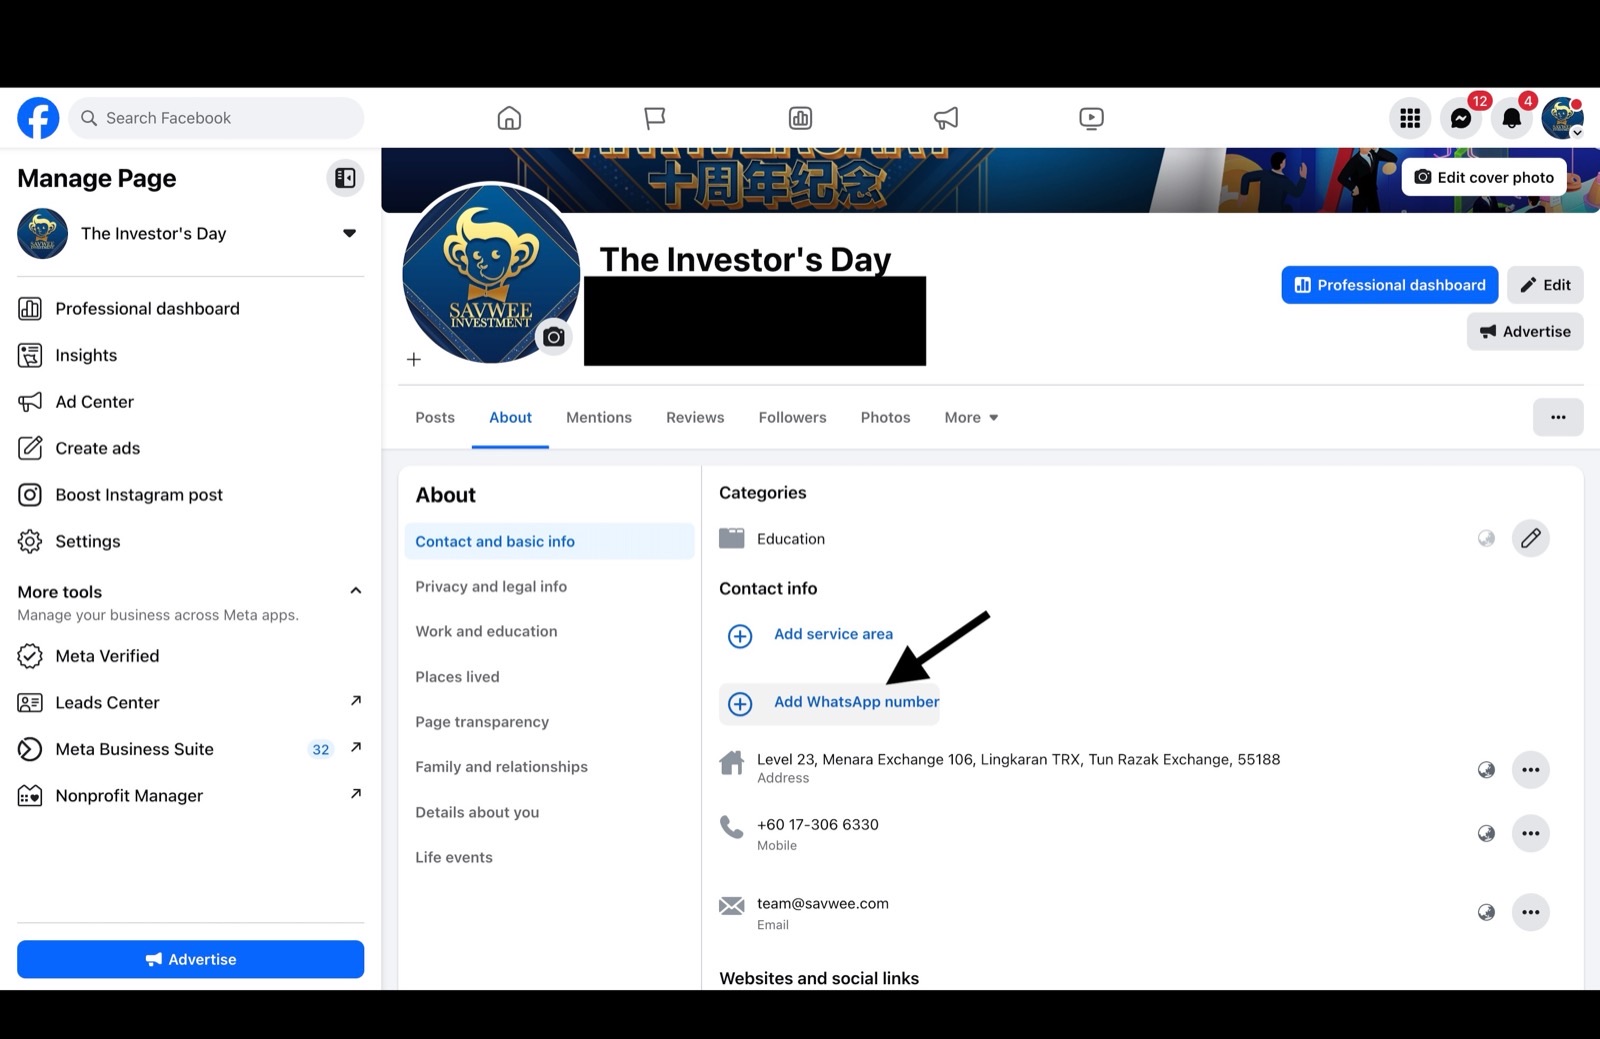
Add WhatsApp number button under Contact info in Page details
Step 4: Enter and Confirm the Number
- Choose your country code
- Enter your WhatsApp Cloud API number
- Click Send WhatsApp Code and verify if prompted
If your Page and WhatsApp number belong to the same Business Manager, the number may link automatically without approval. If it shows "pending" or waiting for approval after you enter the phone number, continue to Step 6.
Step 5 (Optional): Add a WhatsApp Button to Your Page
You can add a Send WhatsApp Message button so visitors can contact you directly from your Page.
Step 6: Approve Pending Requests in Business Manager
If the number sits in a different Business Manager, the link request needs manual approval:
- Go to https://business.facebook.com/latest/settings/requests and log in with the Facebook account that has admin access to the business portfolio that owns the WhatsApp number
- Look for the Requests tab or section: this is where pending requests from third-party services appear
- Find the pending connection request and click Approve: this confirms you authorize the service to send messages on behalf of this phone number
Once approved, the phone number should appear at https://www.facebook.com/settings/?tab=linked_whatsapp.
Part 2: Create a WhatsApp Ads Campaign
Step 7: Start a New Campaign
In Ads Manager, click Create and choose Leads as your campaign objective.
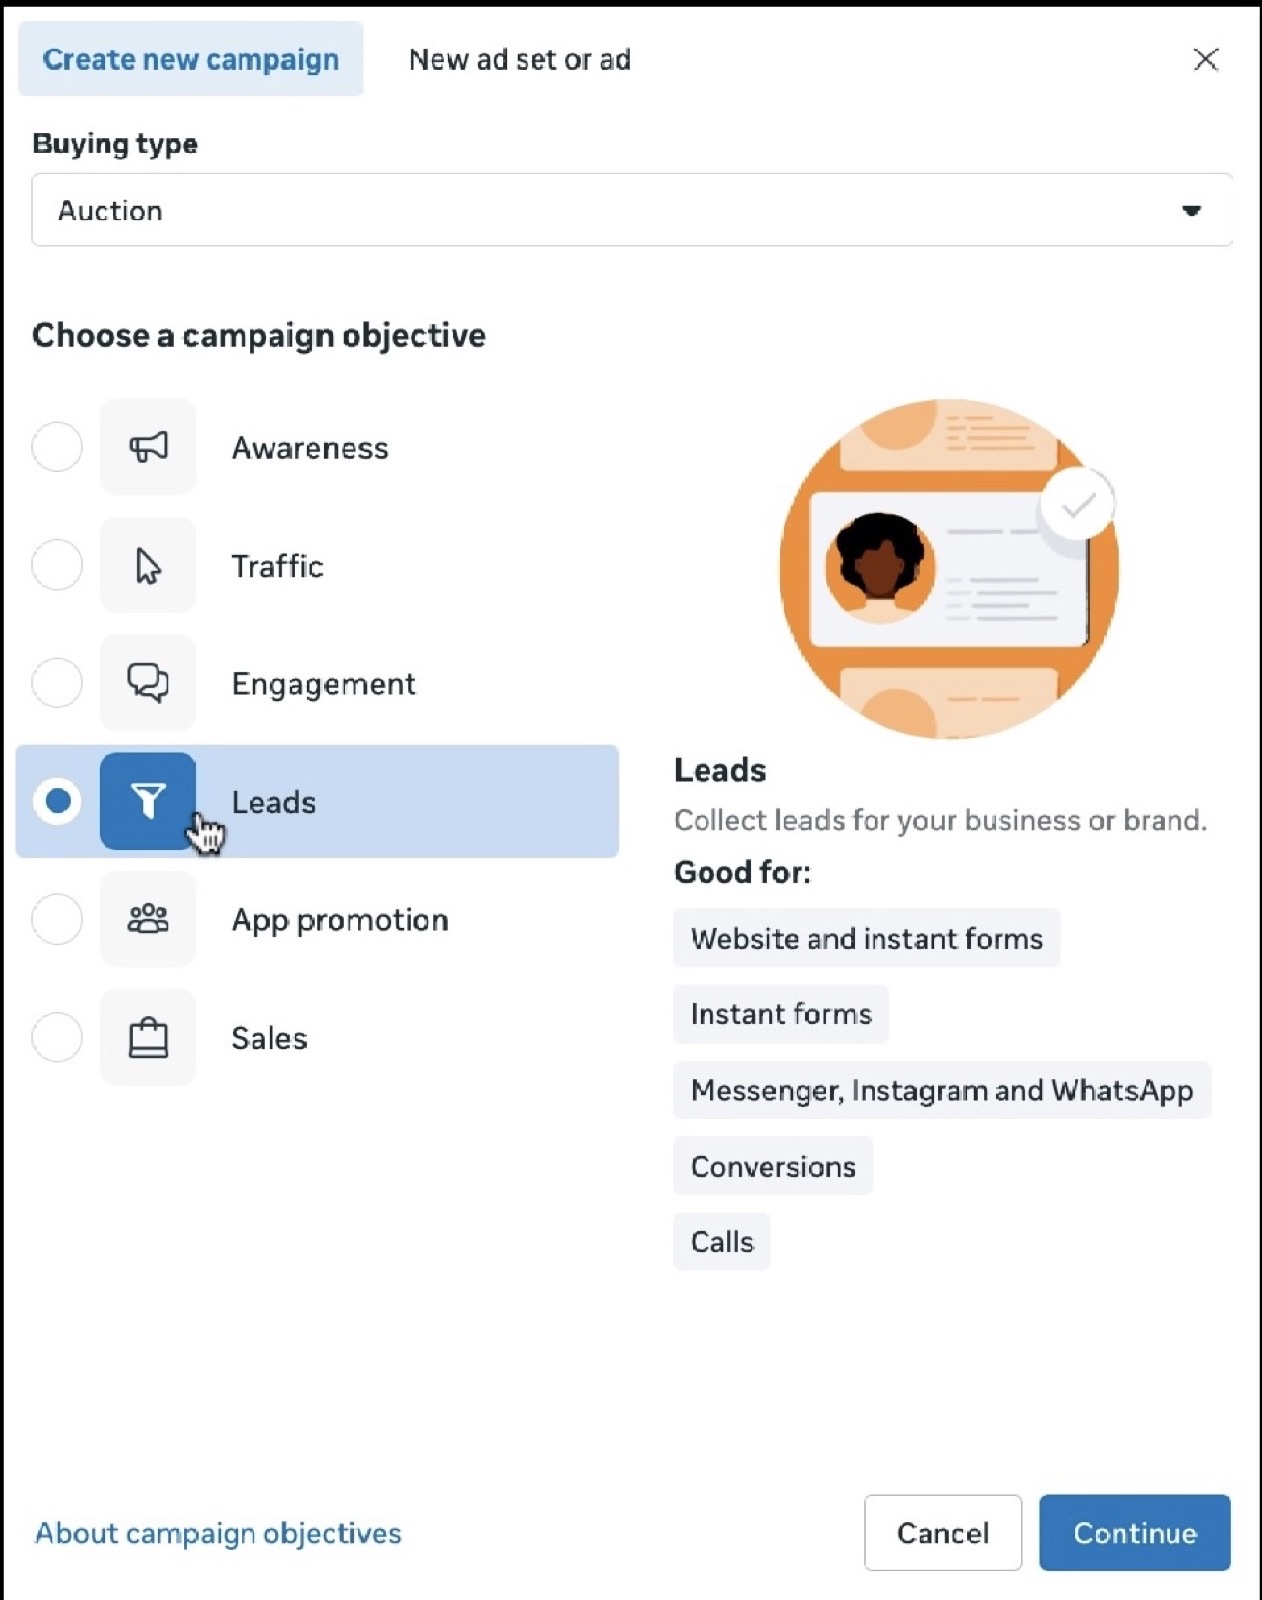
Choosing Leads as the campaign objective in Ads Manager
Step 8: Choose Manual Setup
Select Manual leads campaign for full control.
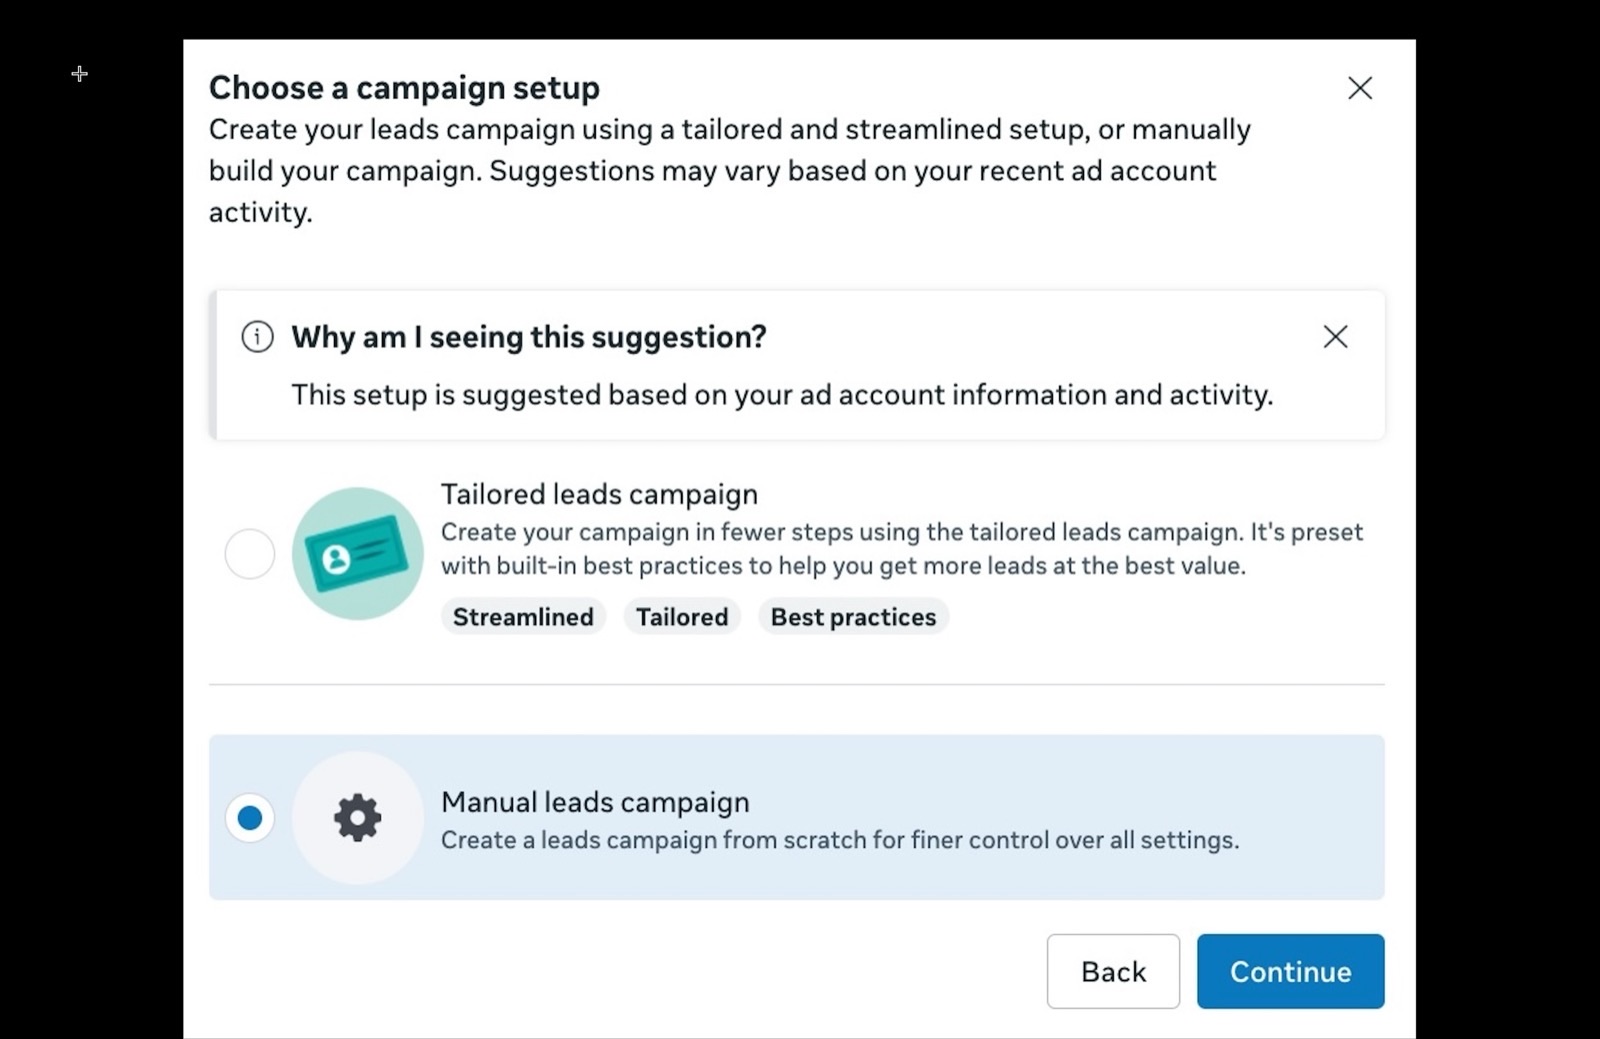
Selecting Manual leads campaign setup
Step 9: Select WhatsApp as Conversion Location
In the Ad Set stage, under Conversion location, select WhatsApp.
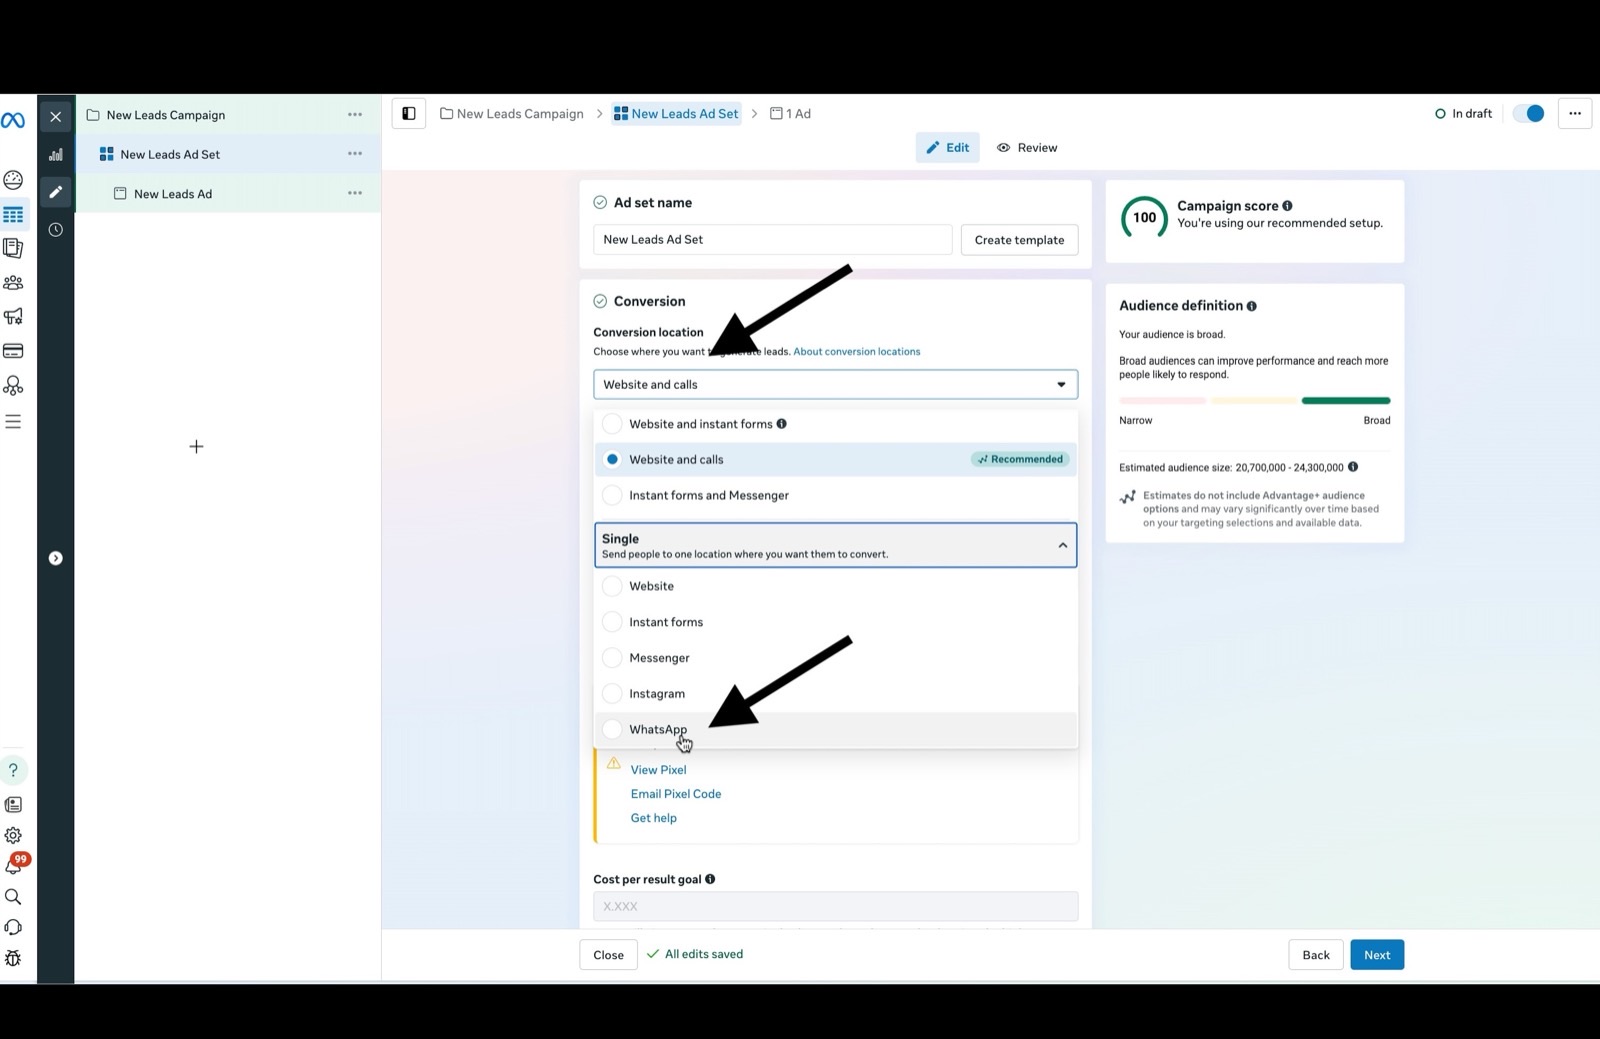
Selecting WhatsApp as the conversion location in the Ad Set
Step 10: Choose Your Facebook Page
Select the Page connected to your WhatsApp number.
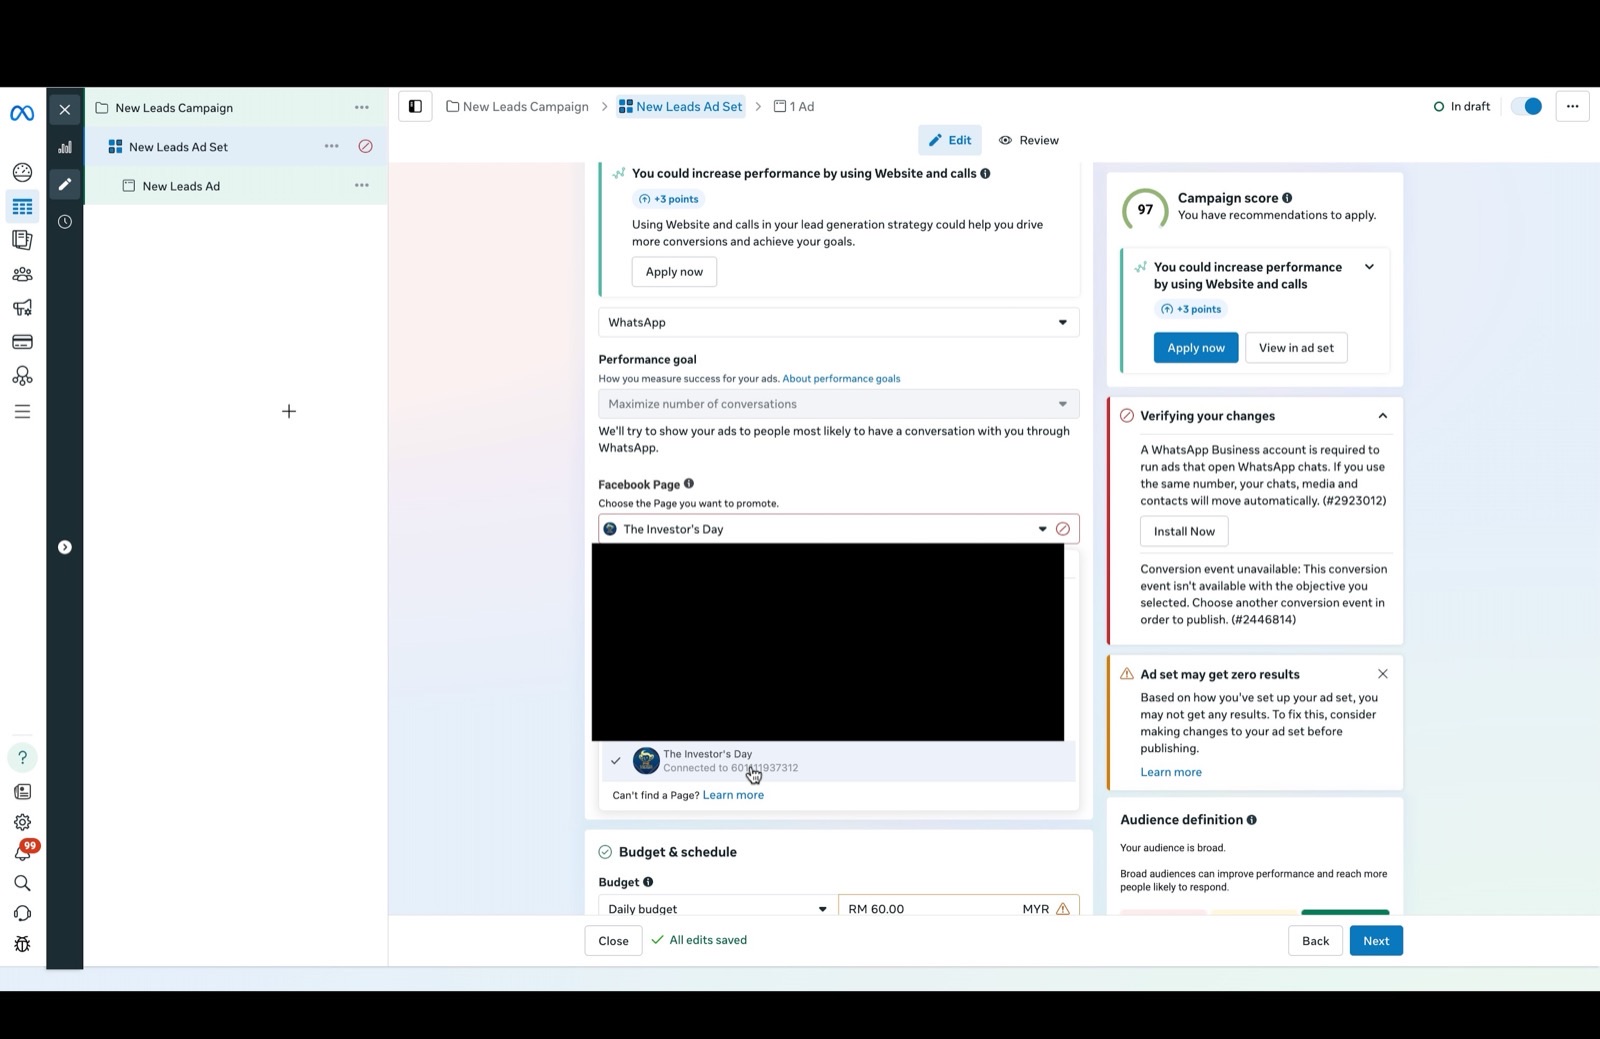
Choosing the Facebook Page linked to the WhatsApp number
Step 11: If the Number Is Missing, Connect It Here
If your WhatsApp number doesn't appear, click Connect account.
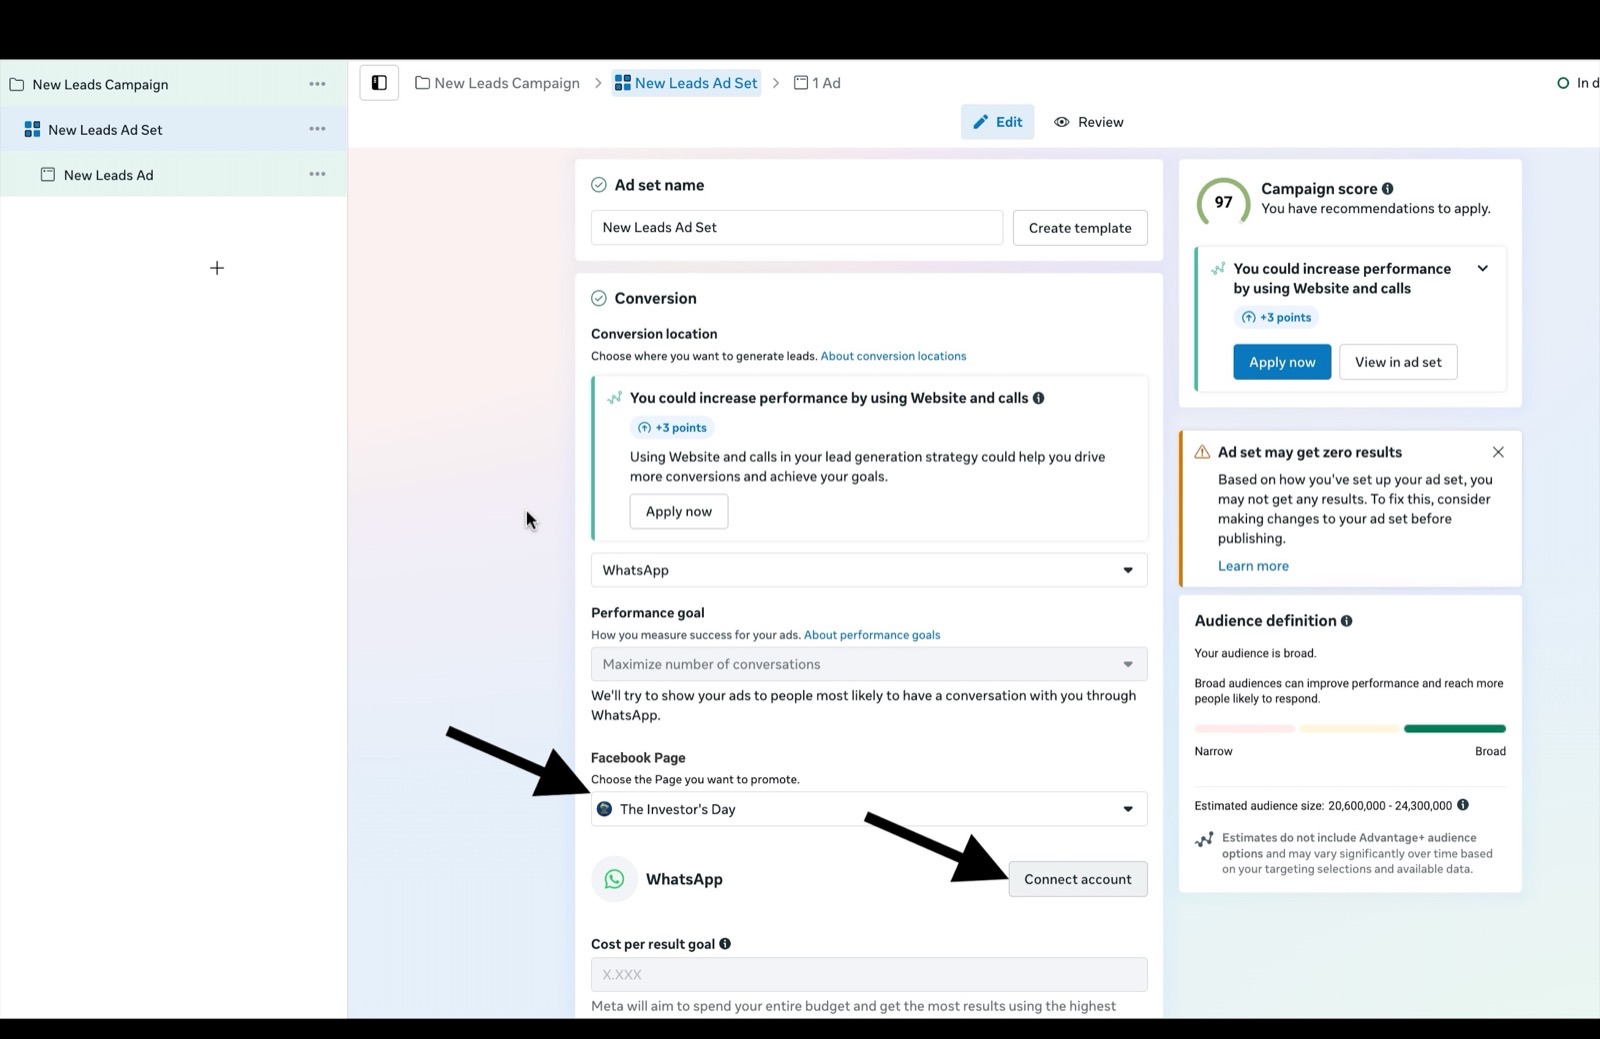
Connect account button when the WhatsApp number is not attached
Step 12: Enter the WhatsApp Number in Ad Setup
- Select your country code
- Enter your WhatsApp Cloud API number
- Click Continue
Flow Summary
- Log in as the Page
- Add the WhatsApp number in Page details
- Approve the request in Business Manager if needed
- In Ads Manager, select Leads > Manual setup > WhatsApp
- Choose the Page and confirm the number is connected
- If the number is missing, connect the account again in the Ad Set