Connecting Your LINE Official Account With ABC Sales AI
For businesses in Taiwan, Thailand, Japan, and Korea - connect your LINE Official Account to reach customers on their preferred messaging platform.
Why LINE?
LINE is the dominant messaging platform in several Asian markets with over 200 million active users. This integration allows you to:
- Automate LINE message responses with AI
- Use AI agents for LINE conversations
- Run automation sequences on LINE
- Manage all messaging channels in one unified inbox
Part A: Create a LINE Business ID Account
Step 1: Go to LINE Business Account Portal
- Visit account.line.biz/login
- Click "Create an account" at the bottom of the login screen
- Choose "Sign up with email" (recommended for business use)
Step 2: Enter Your Email
- Enter your business email address
- Click "Send signup link"
- Check your email inbox for the verification link
- Click the link to continue registration
Step 3: Set Your Password
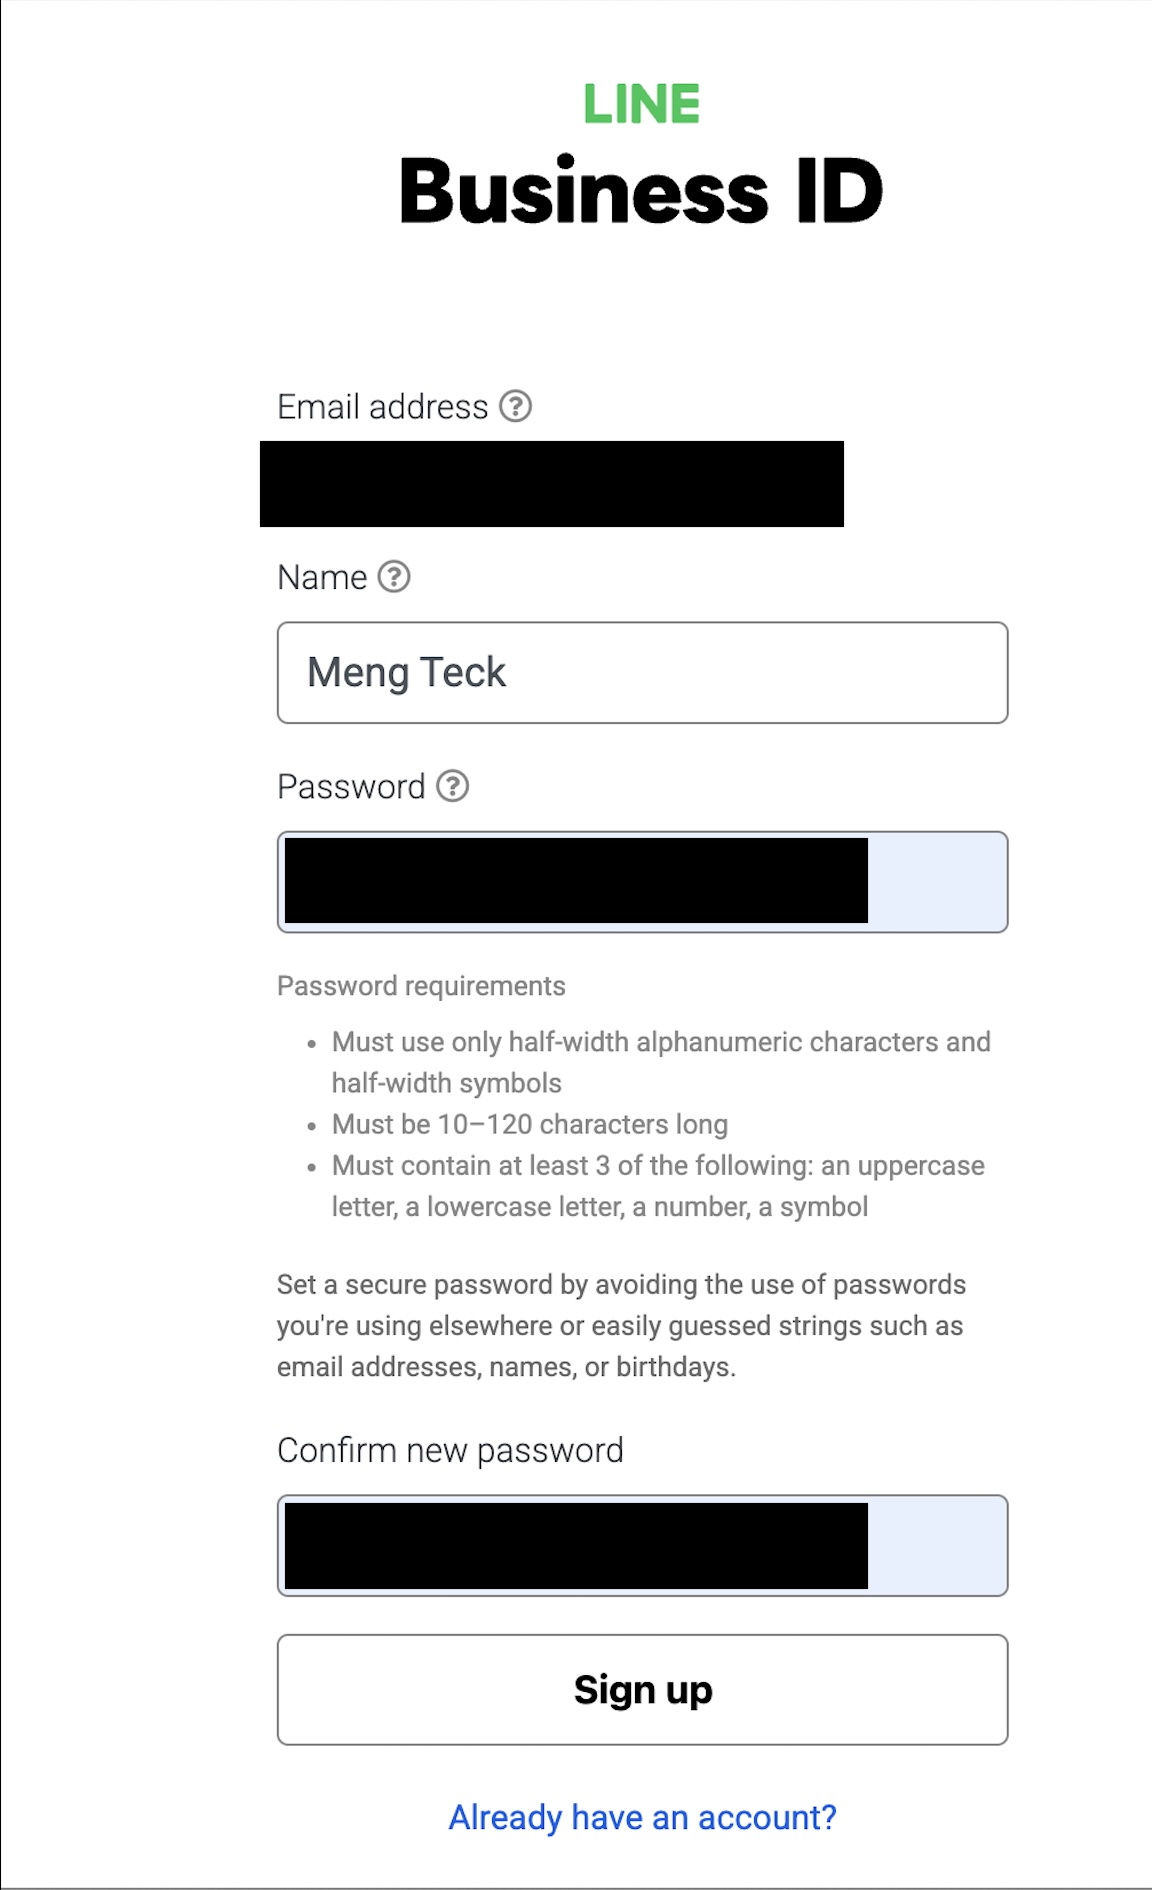
Enter your password - must meet LINE's security requirements
Complete the registration form with:
- Email address - Pre-filled from the link
- Name - Your name (for account identification)
- Password - Must meet these requirements:
- Must use only half-width alphanumeric characters and symbols
- Must be 10-120 characters long
- Must contain at least 3 of: uppercase letter, lowercase letter, number, symbol
- Enter and confirm your password
- Click "Sign up"
Step 4: Confirm Registration
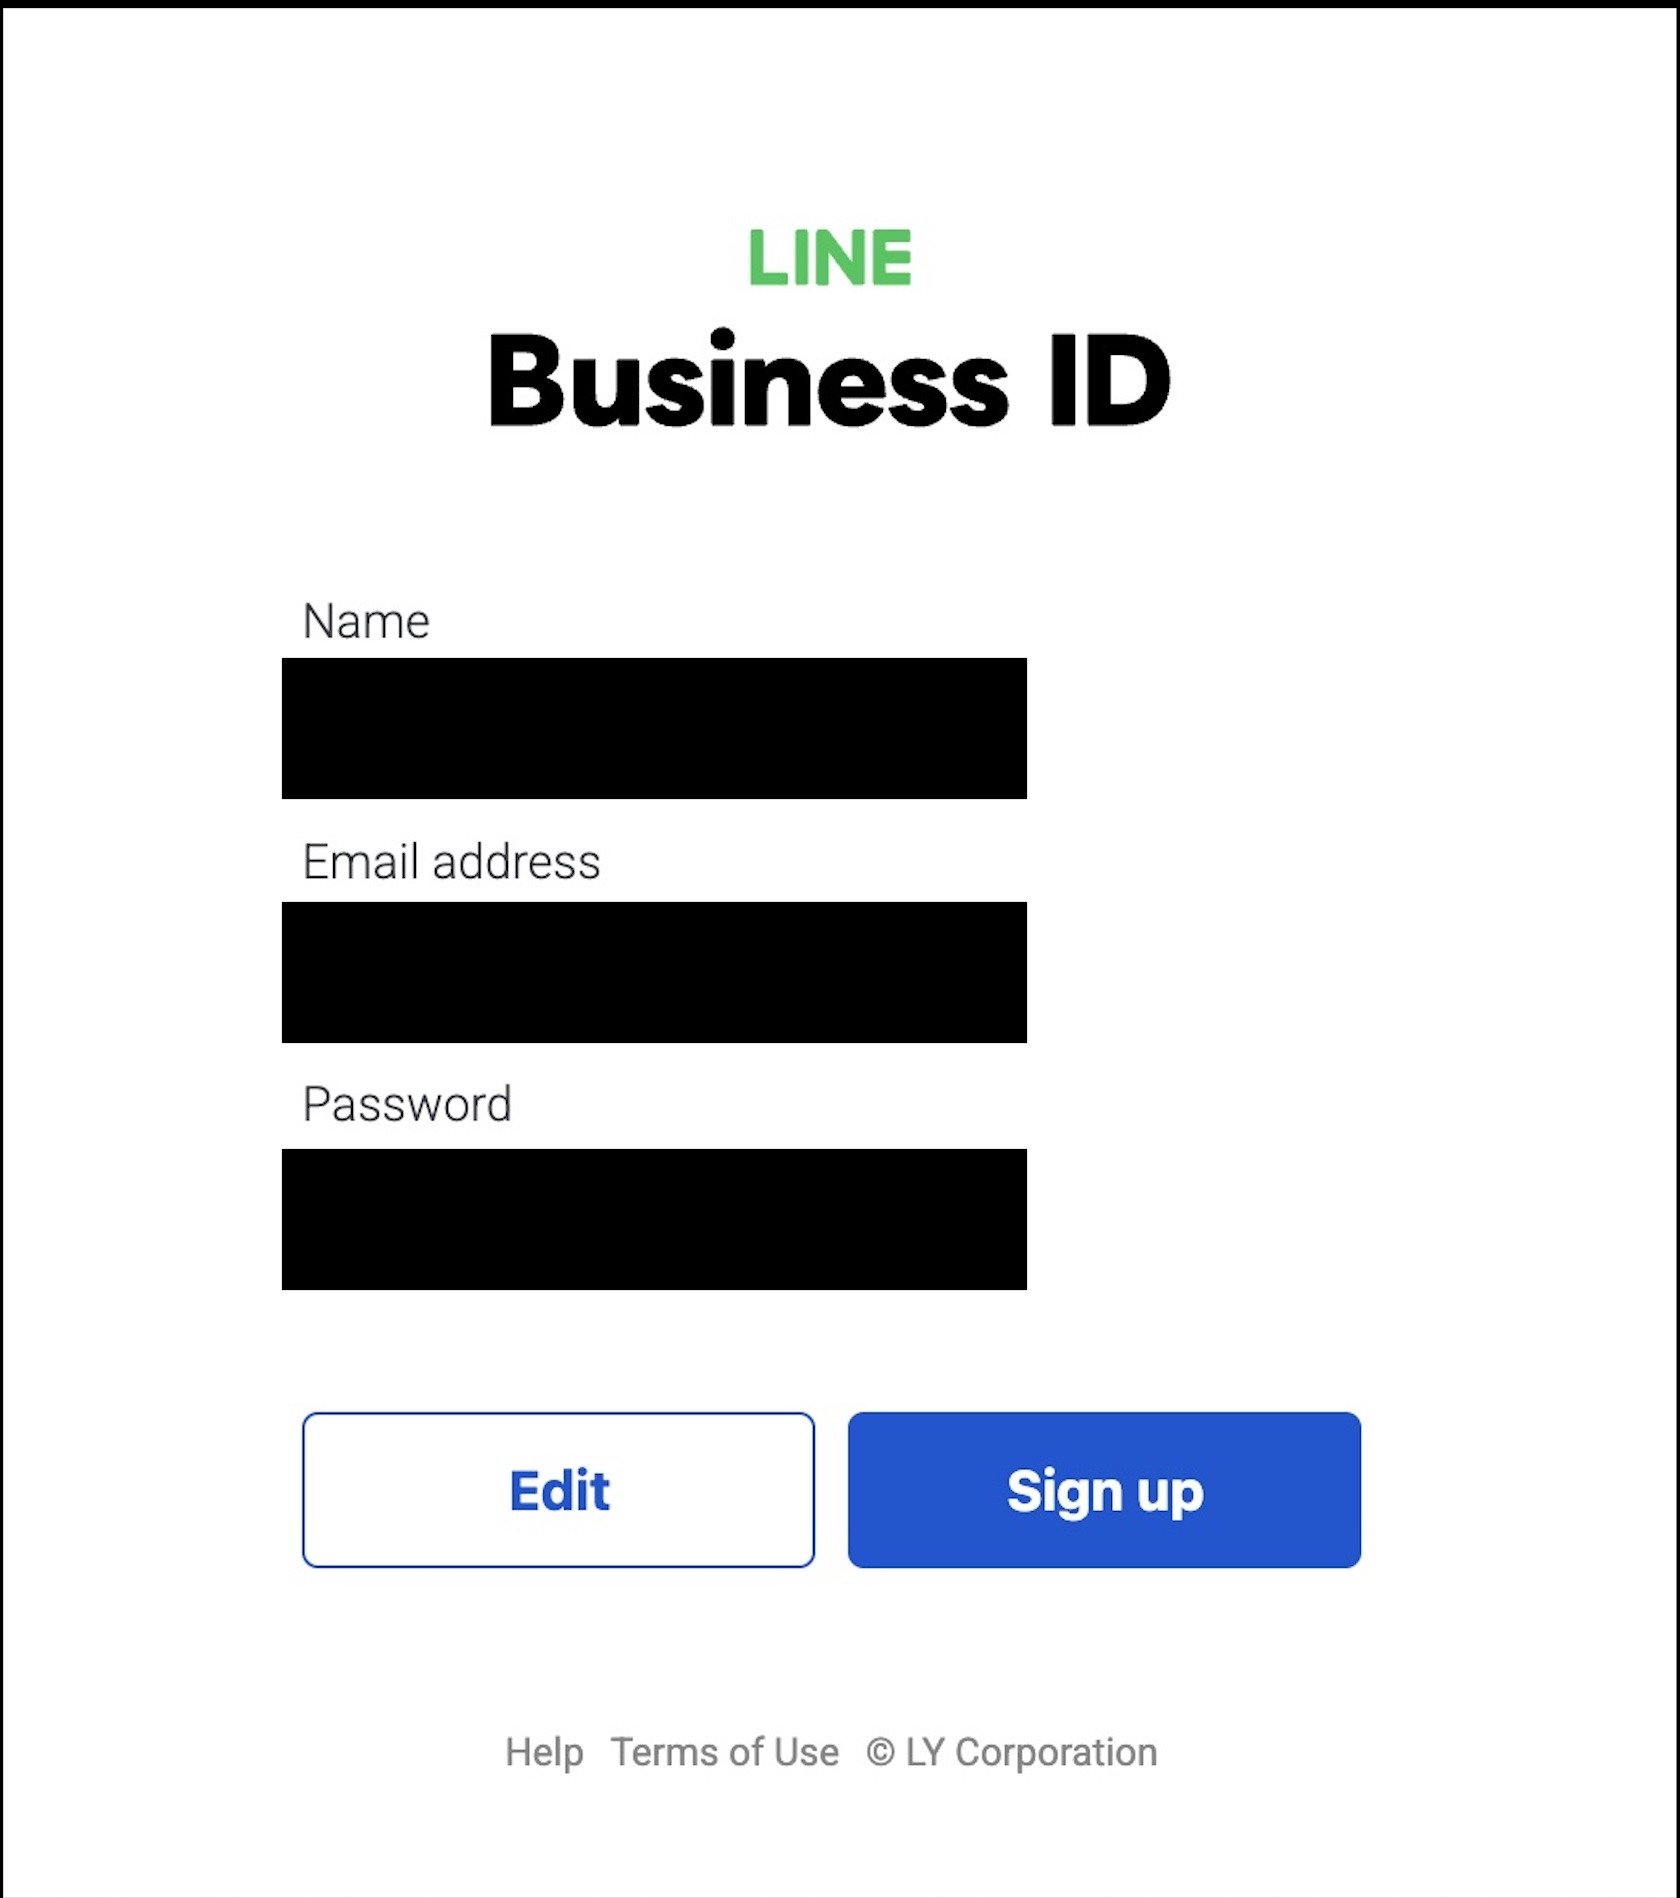
Complete your LINE Business ID registration
- Review your information (Name, Email, Password)
- Click "Sign up" to finalize your LINE Business ID
Part B: Create a LINE Official Account
Step 1: Access LINE Official Account Manager
After registration, go to manager.line.biz
- You'll see the "Accounts" page
- Click the green "Create LINE official account" button
Step 2: Phone Verification (If Required)
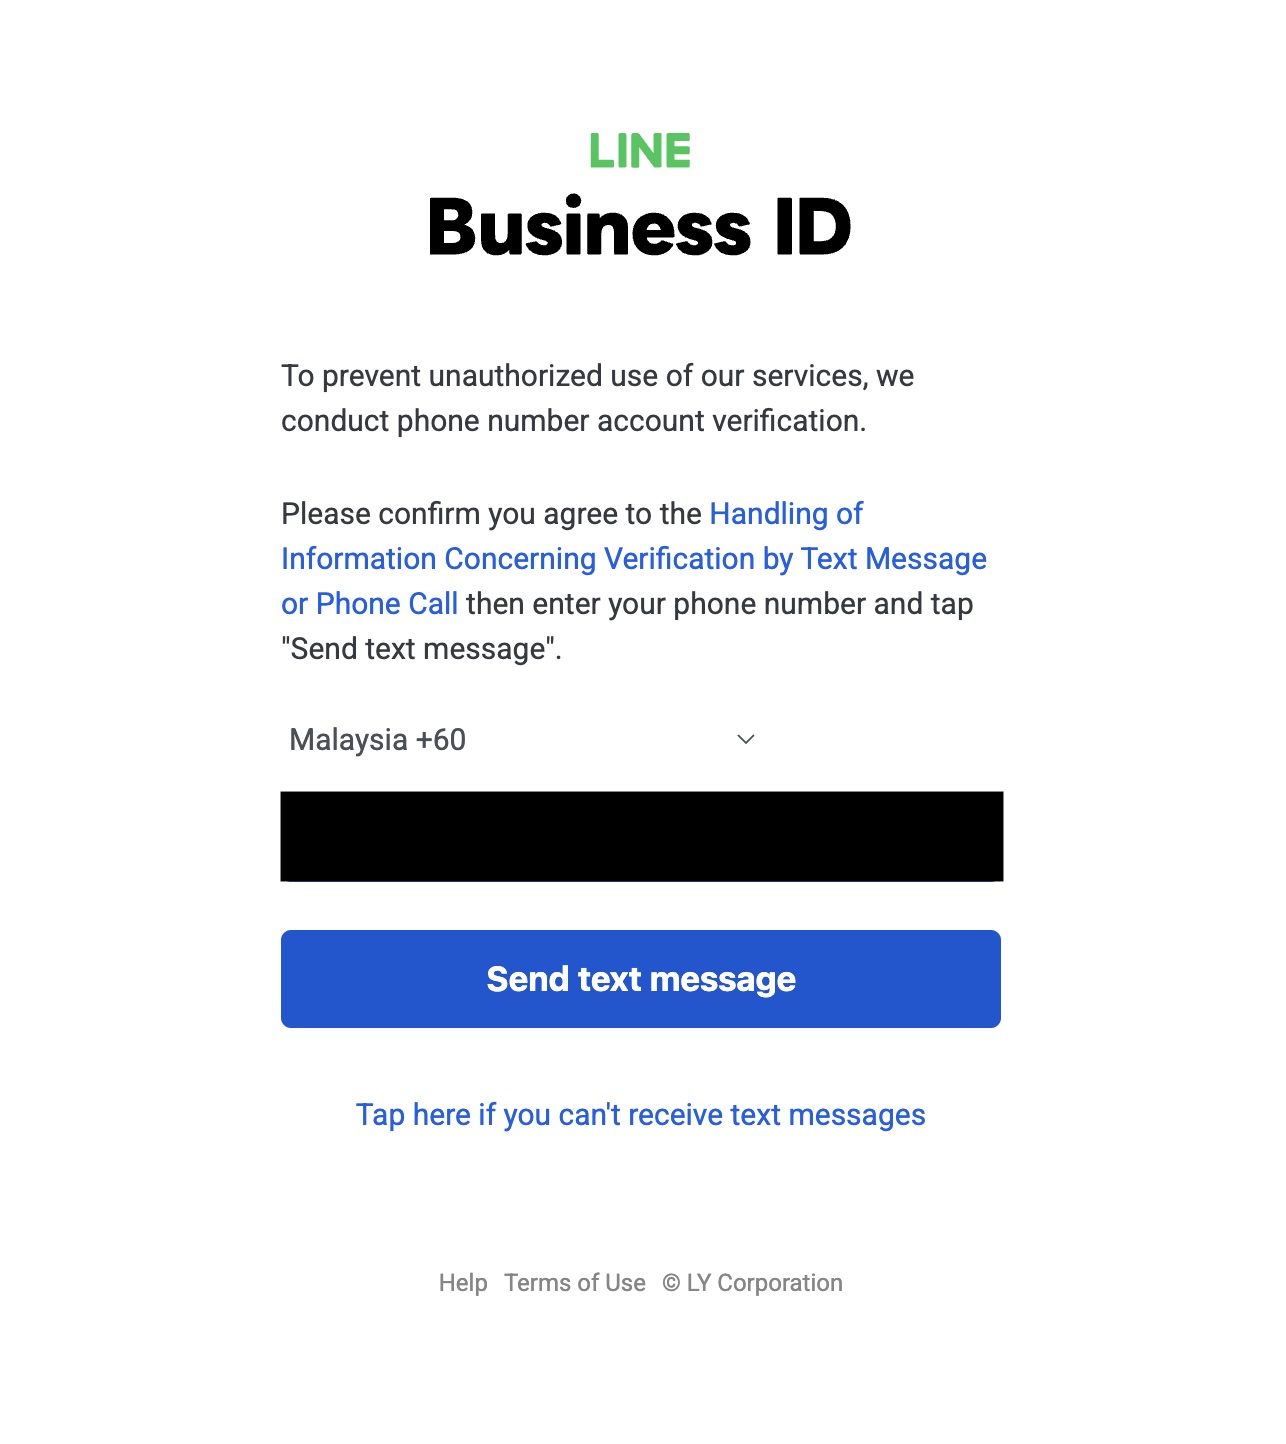
Enter the OTP sent to your phone
You may see a modal: "Verify your account by text message"
- Click "Verify by text message"
- Select your country code (e.g., Malaysia +60)
- Enter your phone number
- Click "Send text message"
- Enter the OTP code you receive
- If you can't receive texts, click "Tap here if you can't receive text messages"
Step 3: Enter Company Information
Enter your company information in the wizard
You'll see a 3-step wizard:
Step 1 of 3 - Enter company info:
- Account name - This will appear on customers' LINE friend list and chat screen (max 20 characters)
- Email address - Your business email
- Company or owner's country/region - Select your location
- Company name - Your registered business name
- Industry - Select your main industry and sub-industry
- Use your brand name customers will recognize
- This cannot be easily changed later
- Keep it professional and memorable
Step 4: Confirm Your Information
Step 2 of 3 - Check application:
- Review all the details you entered
- Make sure everything is correct
- Click "Submit" to create your LINE Official Account
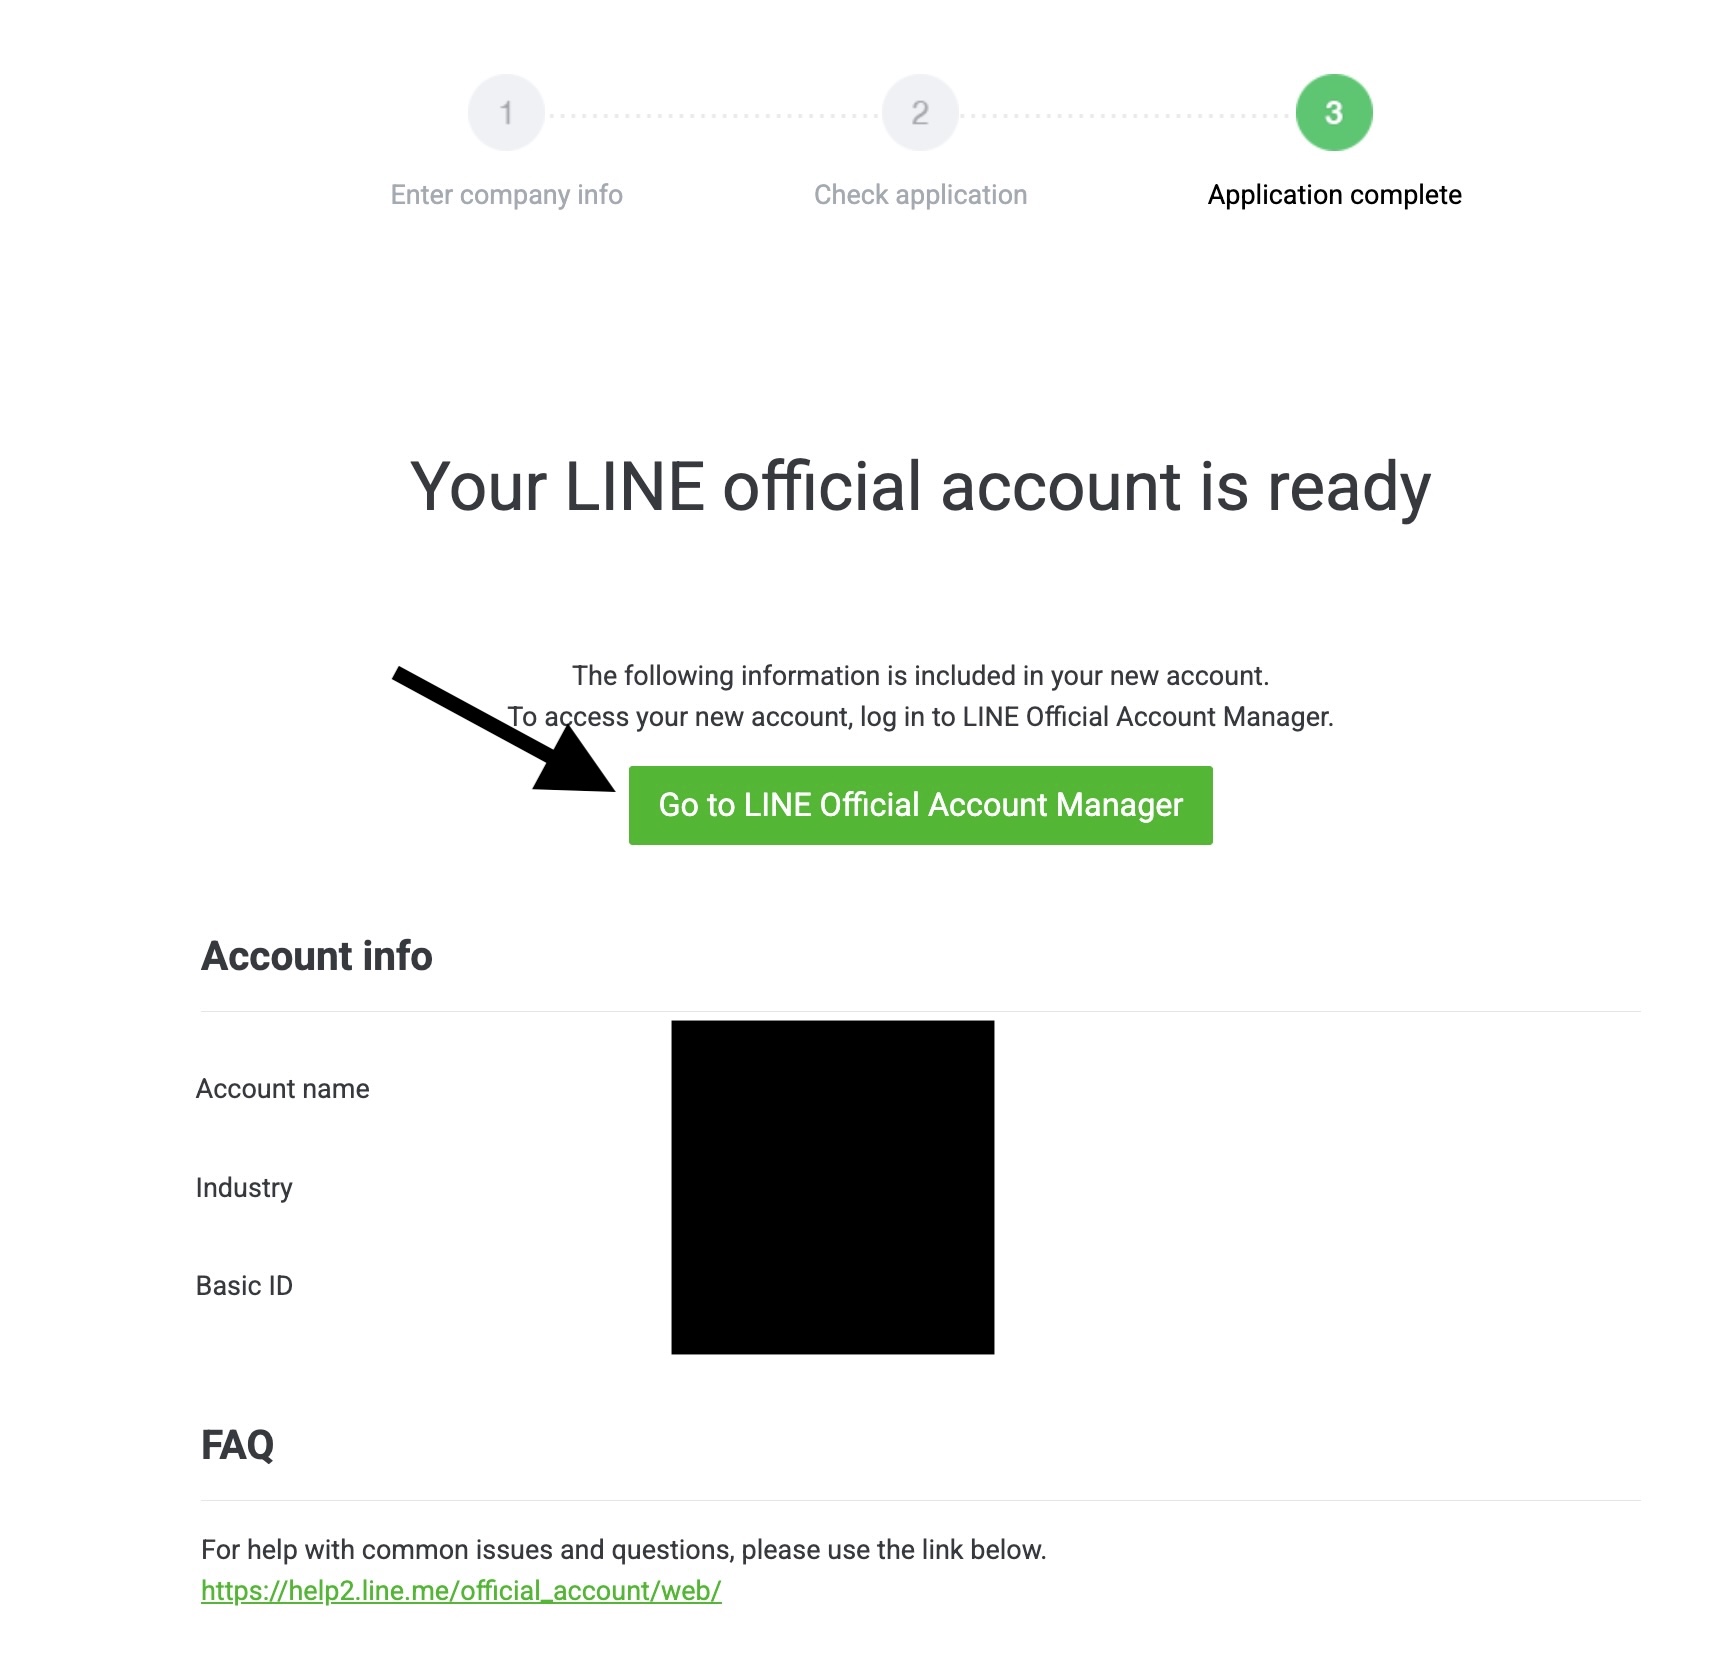
Step 5: Application Complete
Step 3 of 3 - Application complete:
You'll see "Your LINE official account is ready" with:
- Your Account info (Account name, Industry, Basic ID)
- A link to LINE Official Account FAQ
- A green button to "Go to LINE Official Account Manager"
Click the button to proceed to your dashboard.
Part C: Set Up LINE Official Account Manager
Step 1: Welcome to Dashboard

Welcome screen with QR code to add your account as a friend
When you first access LINE Official Account Manager, you'll see a welcome modal:
- It recommends adding your official account as a friend using the QR code
- Click "Next" to continue the setup wizard
- Complete the initial setup steps
Step 2: Navigate to Settings
- Click "Settings" (gear icon) in the top-right corner
- In the left sidebar, you'll see:
- Account settings
- Manage permissions
- Response settings ← Important!
- Messaging API ← Important!
- Registered info
Part D: Configure Response Settings (Critical!)
Step 1: Go to Response Settings
- In Settings, click "Response settings" in the left sidebar
- You'll see the "Toggle responses" section
Step 2: Before Configuration (Default State)
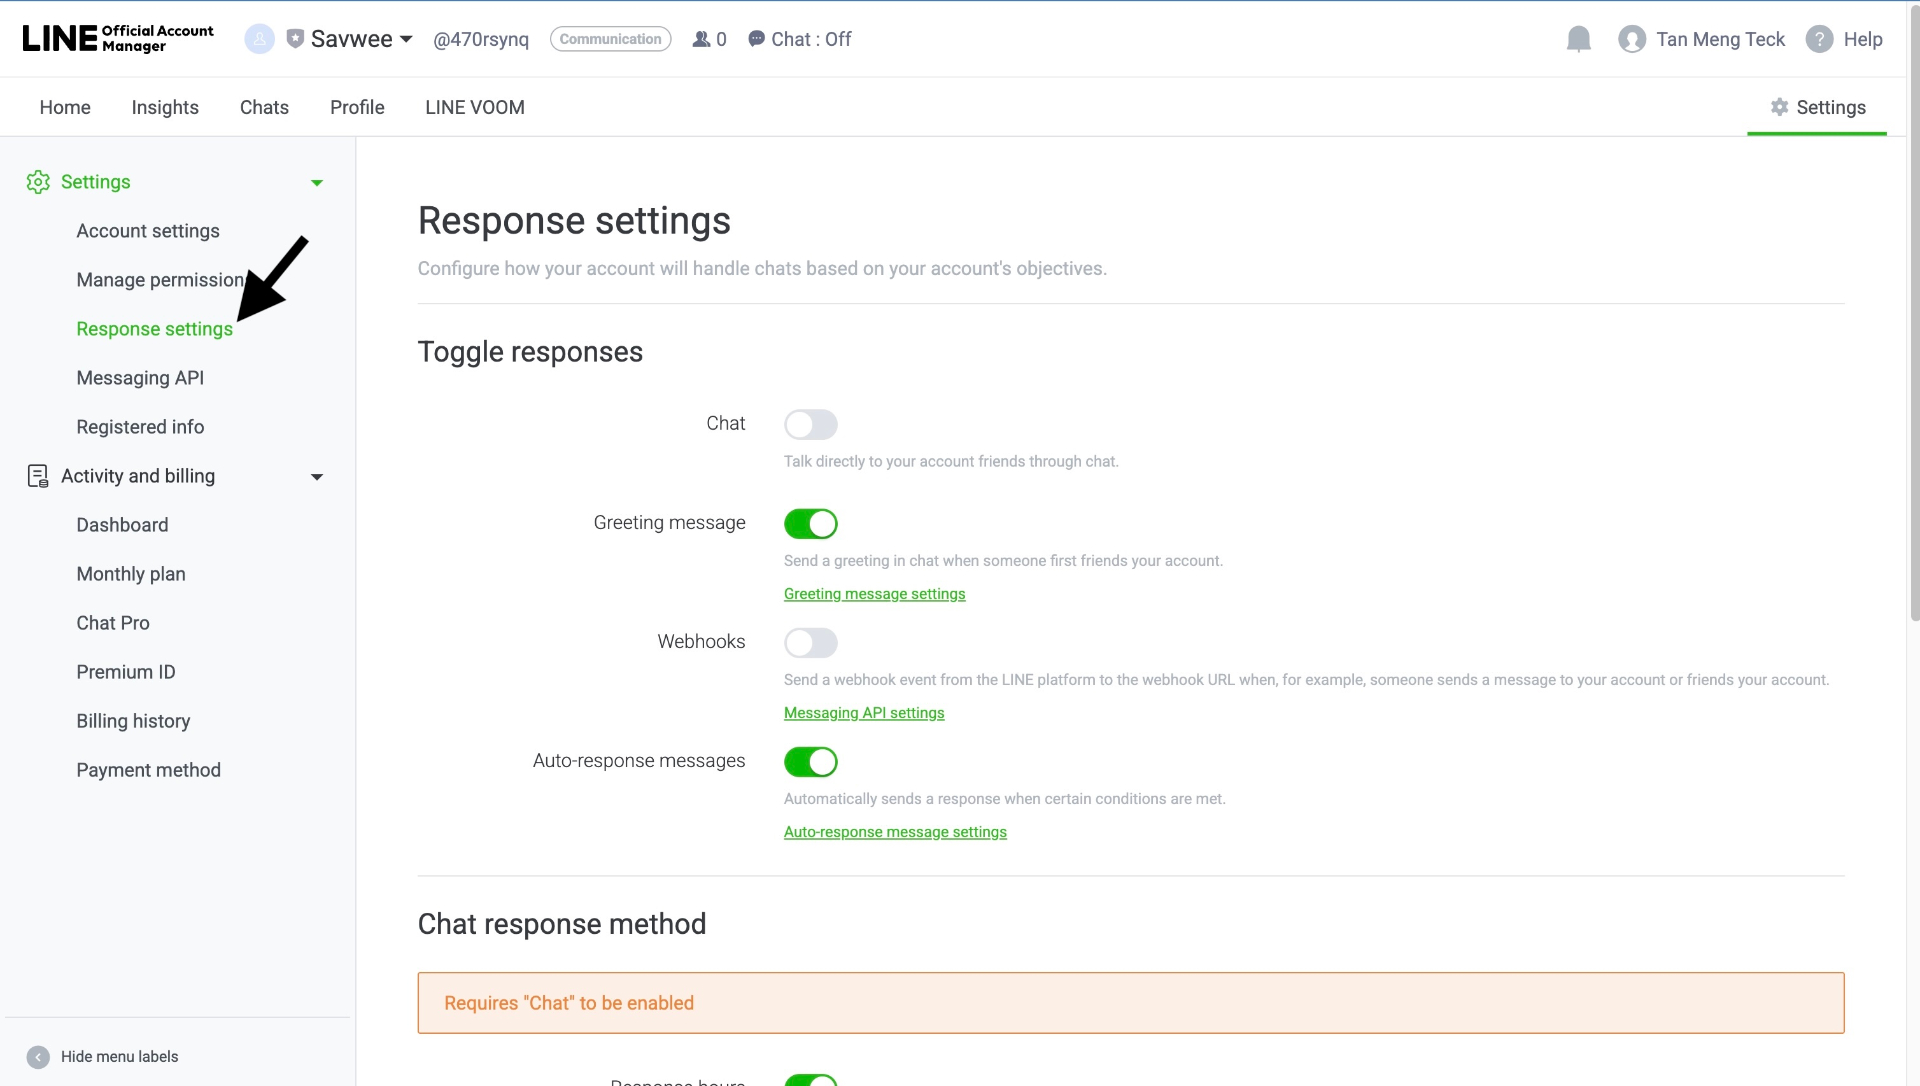
Default Response Settings - these need to be changed
The default settings look like this:
- Chat: OFF
- Greeting message: ON ⚠️
- Webhooks: OFF
- Auto-response messages: ON ⚠️
Step 3: After Configuration (Required State)
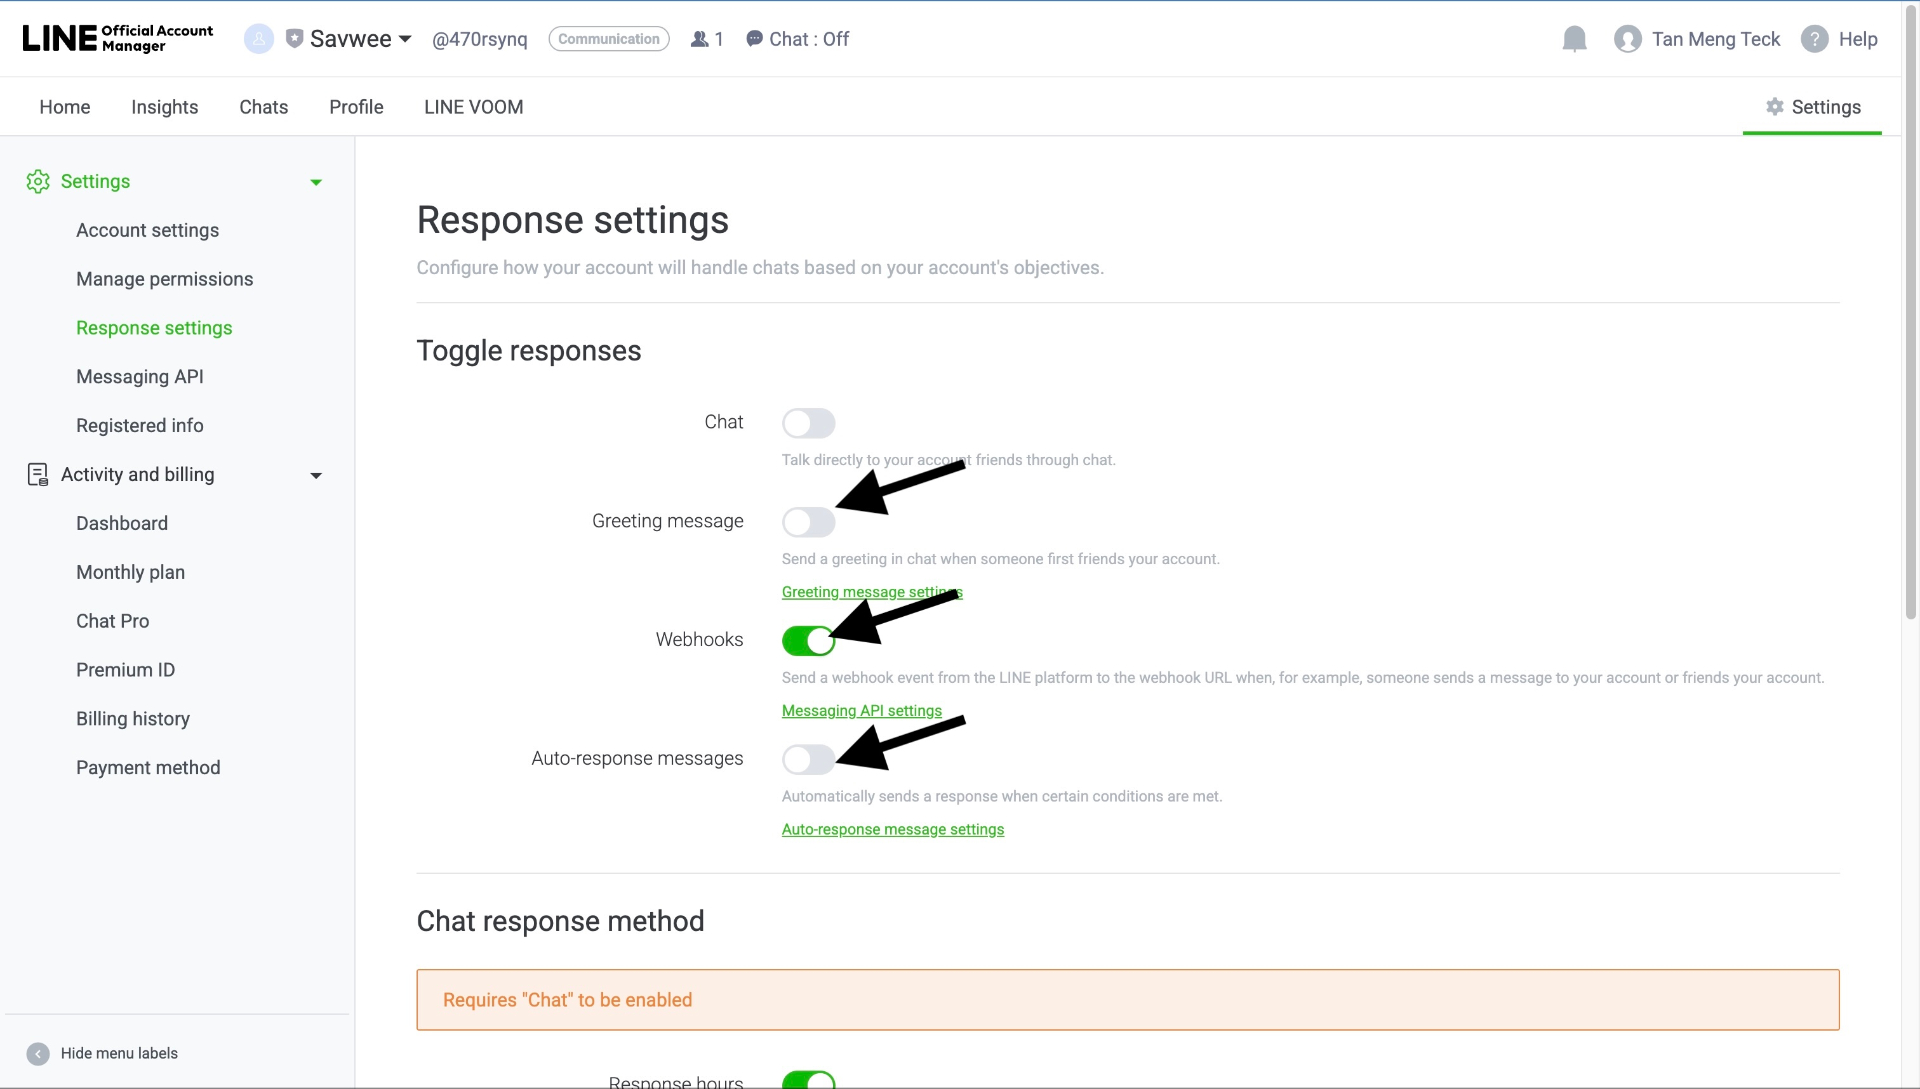
Correct Response Settings for ABC Sales AI integration
Change the settings to:
- Chat: OFF - Keep off - ABC Sales AI handles chat
- Greeting message: OFF - Turn OFF to prevent duplicate greetings
- Webhooks: ON - Turn ON to receive messages in ABC Sales AI
- Auto-response messages: OFF - Turn OFF to let AI respond instead
- ❌ Greeting message = OFF
- ✅ Webhooks = ON
- ❌ Auto-response messages = OFF
Part E: Enable Messaging API
Step 1: Navigate to Messaging API
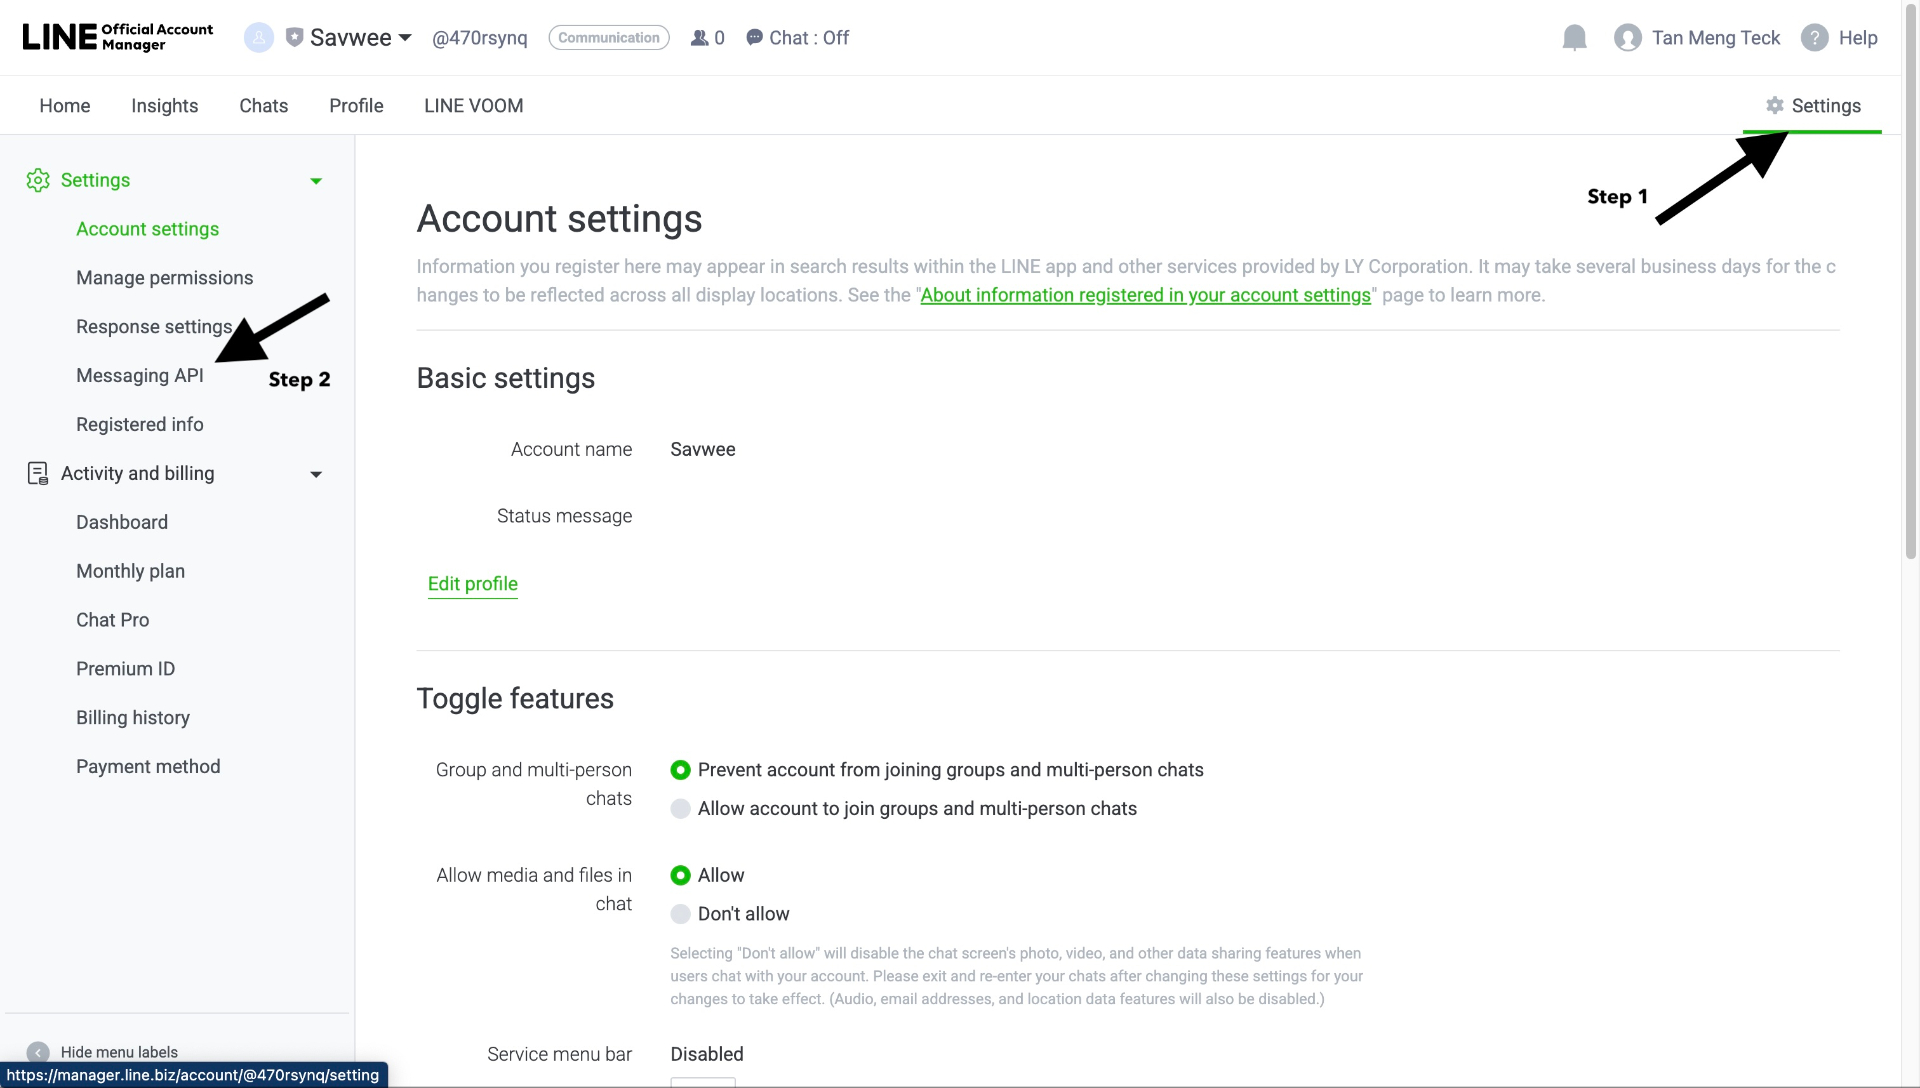
Messaging API section in Settings
- In Settings, click "Messaging API" in the left sidebar
- You'll see the Messaging API page with "Status: Disabled"
Step 2: Enable Messaging API

Click to enable Messaging API
- Click the green "Enable Messaging API" button
- A modal will appear: "Enabling Messaging API"
Step 3: Enter Provider Information
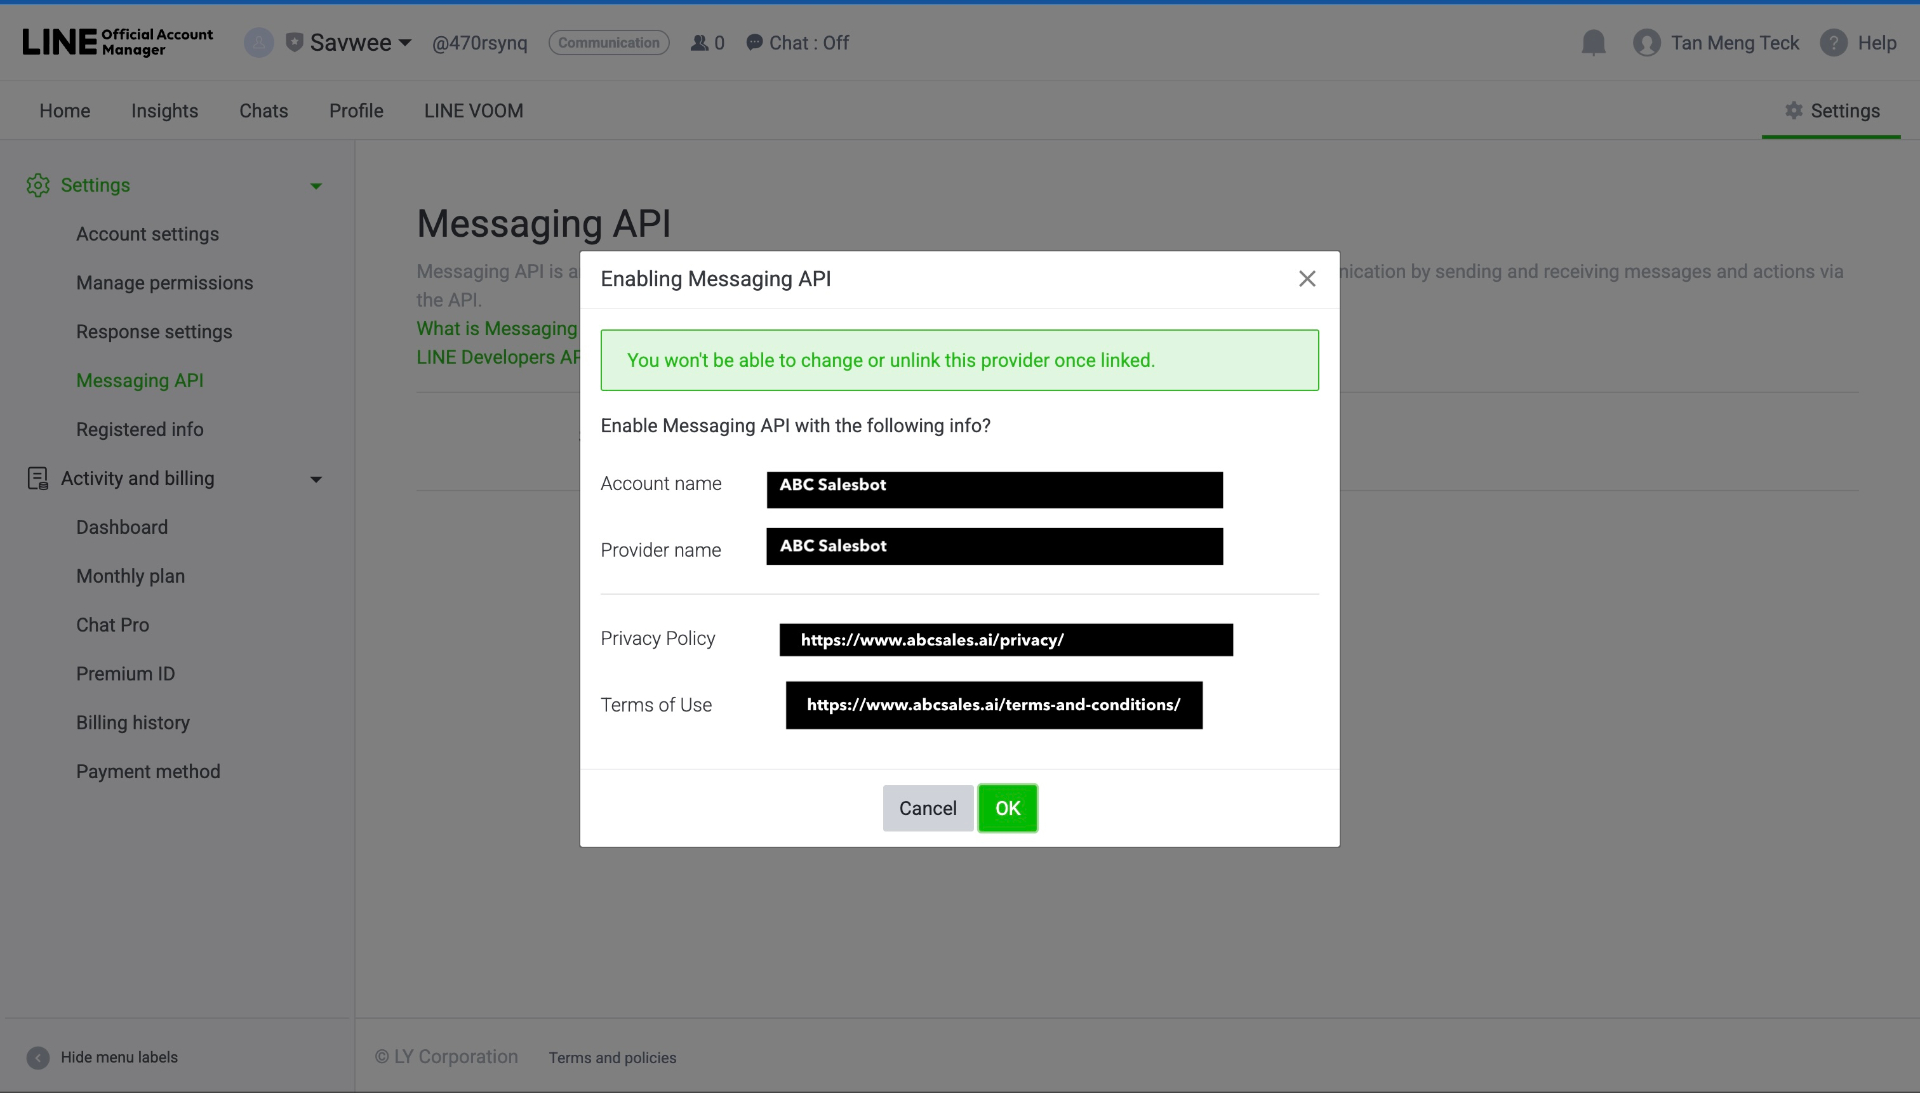
Enter provider details and privacy policy URLs
The modal will ask for:
- Account name - Auto-filled with your account name
- Provider name - Enter your company name (e.g., "ABC Sales AI")
Step 4: Enter Privacy Policy & Terms of Use
You must provide:
- Privacy Policy - Enter your privacy policy URL (e.g., \
https://www.yourdomain.com/privacy/\) - Terms of Use - Enter your terms URL (e.g., \
https://www.yourdomain.com/terms-and-conditions/\)
Click "OK" to enable the Messaging API.
Part F: Get Credentials from LINE Official Account Manager
After enabling Messaging API, you can get credentials directly from LINE Official Account Manager:
Step 1: View Channel Info
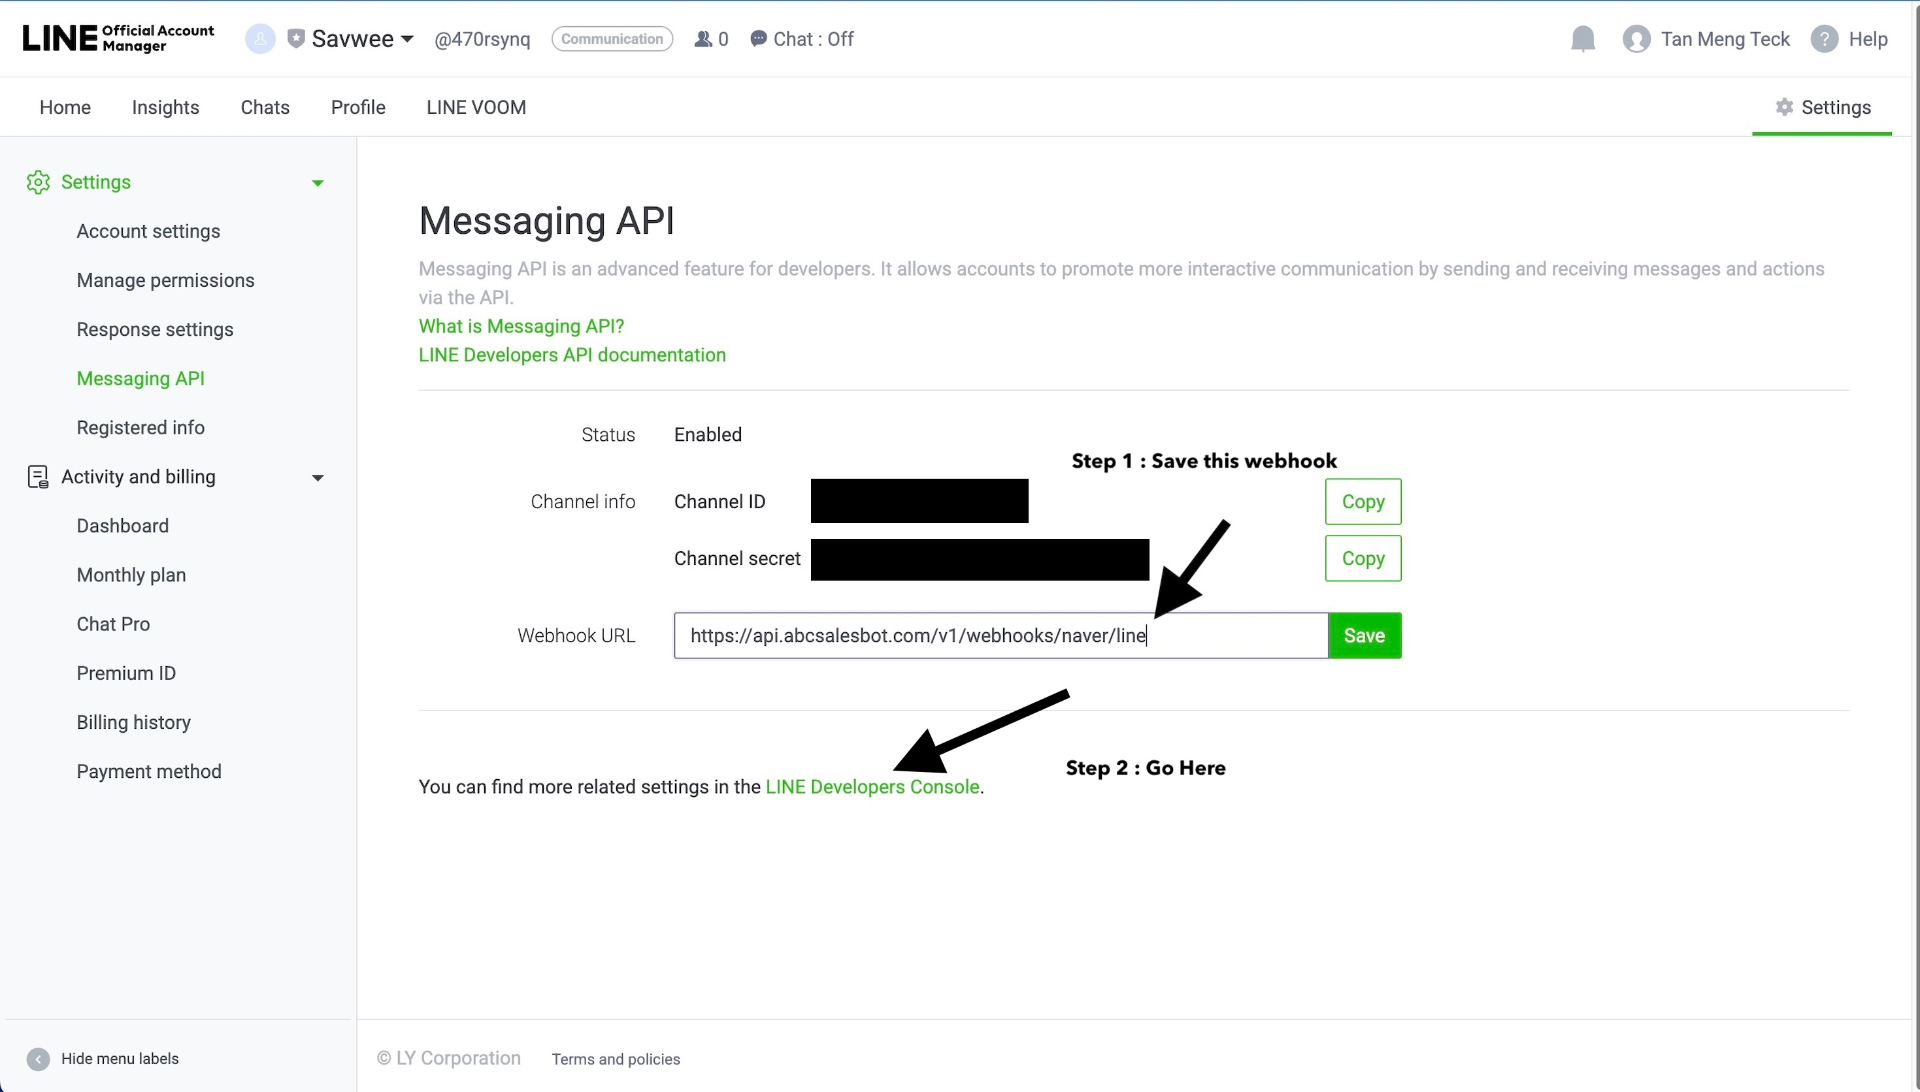
Channel ID, Channel Secret, and Webhook URL settings
In Settings > Messaging API, you'll now see:
- Status: Enabled
- Channel ID - Copy this (click the "Copy" button)
- Channel secret - Copy this (click the "Copy" button)
- Webhook URL - This is where you'll paste ABC Sales AI's URL
Step 2: Save Your Webhook URL from ABC Sales AI

Copy your credentials and configure webhook URL
The webhook URL format is:
\https://api.abcsalesbot.com/v1/webhooks/naver/line\
- Copy the Channel ID and Channel secret
- Paste the ABC Sales AI webhook URL in the Webhook URL field
- Click "Save"
- Click the "LINE Developers Console" link for more settings
Part G: Verify in LINE Developers Console
Step 1: Access LINE Developers Console
Click the link "You can find more related settings in the LINE Developers Console" or go to developers.line.biz
Step 2: Verify Settings
In the Messaging API tab, confirm:
- Allow bot to join group chats: Disabled
- Auto-reply messages: Disabled ✓
- Greeting messages: Disabled ✓
Step 3: Get Channel Access Token

Issue and copy your Channel Access Token
- Scroll down to "Channel access token" section
- Click "Issue" to generate a token (or "Reissue" if one exists)
- Copy and save this token securely - you'll need it for ABC Sales AI
- Channel ID - From Messaging API page
- Channel Secret - From Messaging API page
- Channel Access Token - The long string you just issued
Store them in a secure place before proceeding!
Part H: Connect to ABC Sales AI
Step 1: Access Messaging Channels
- Log into app.abcsalesbot.com
- Go to the "Messaging Channels" tab
- Click "Add Messaging Channel" button (top right)
Step 2: Select Naver Line
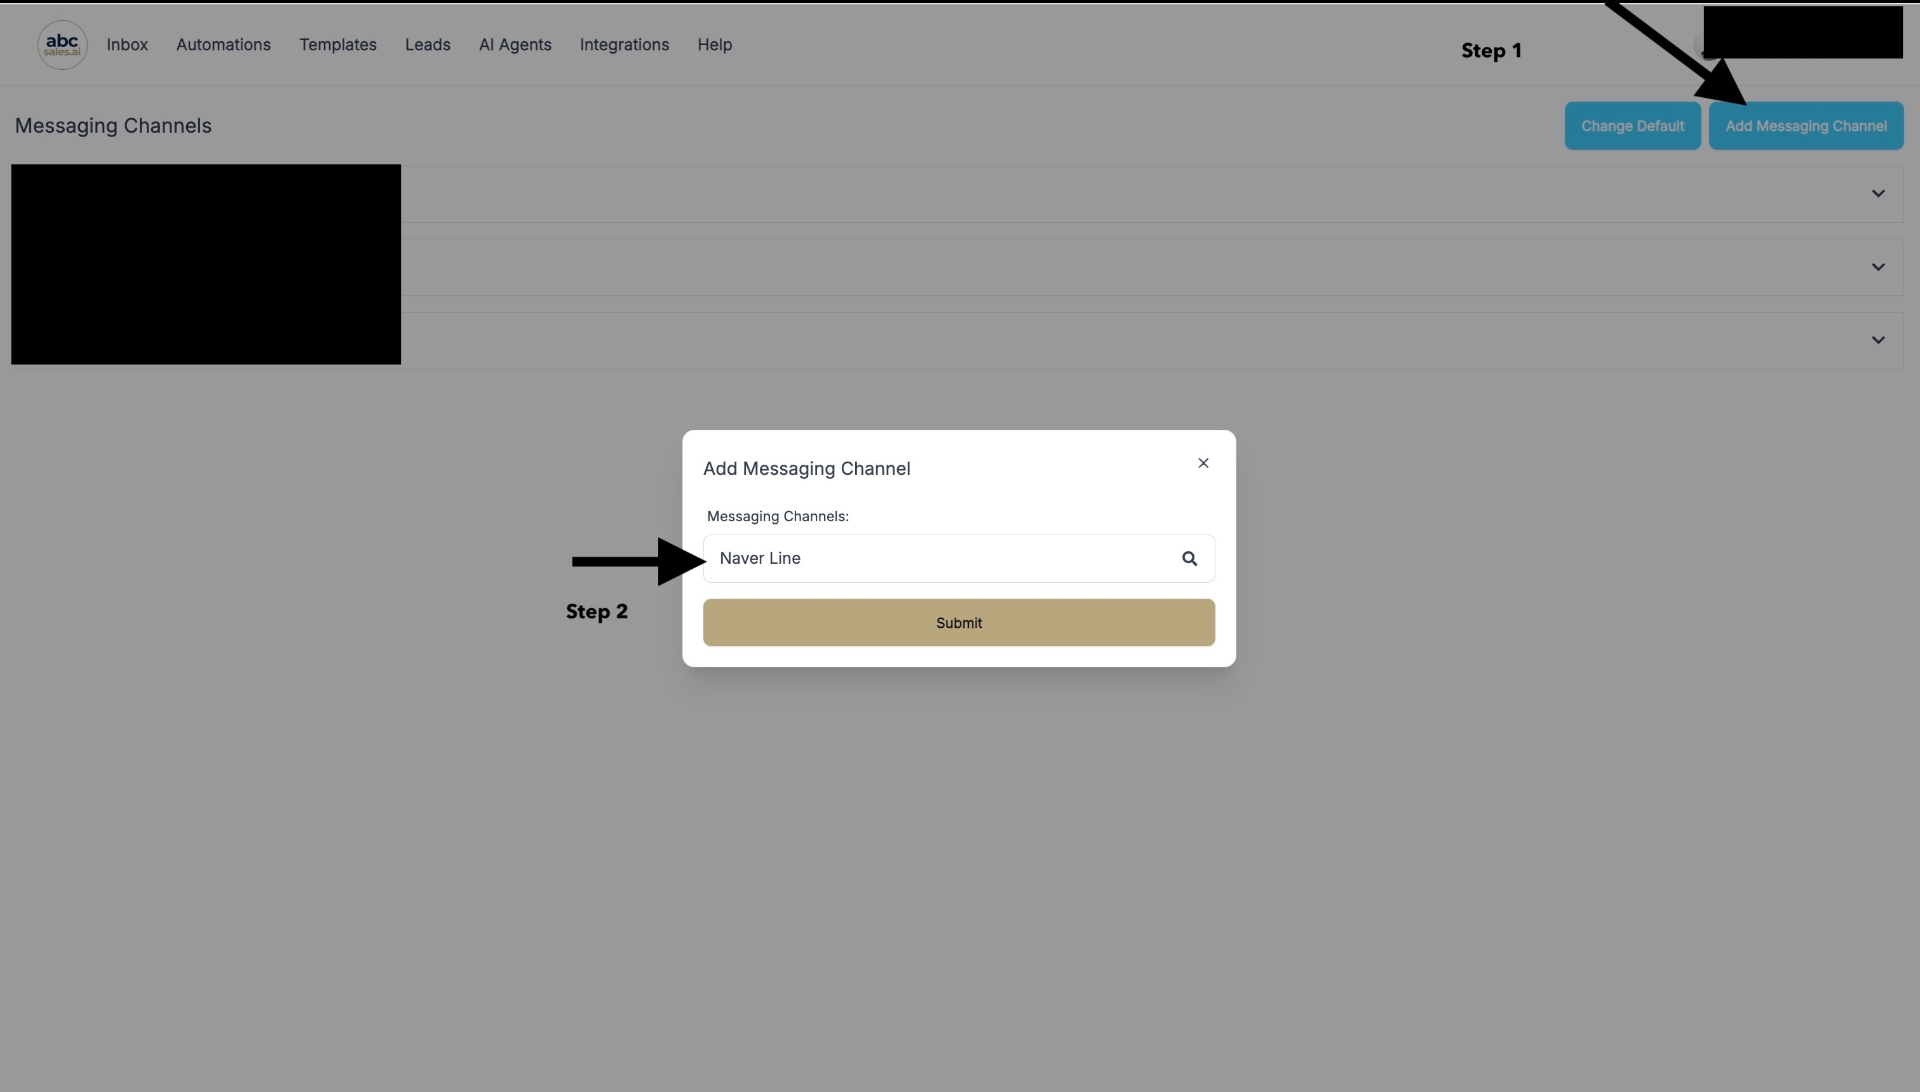
Select "Naver Line" from the dropdown
- In the "Add Messaging Channel" modal, select "Naver Line" from the dropdown
- Click "Submit"
Step 3: Enter Your Credentials
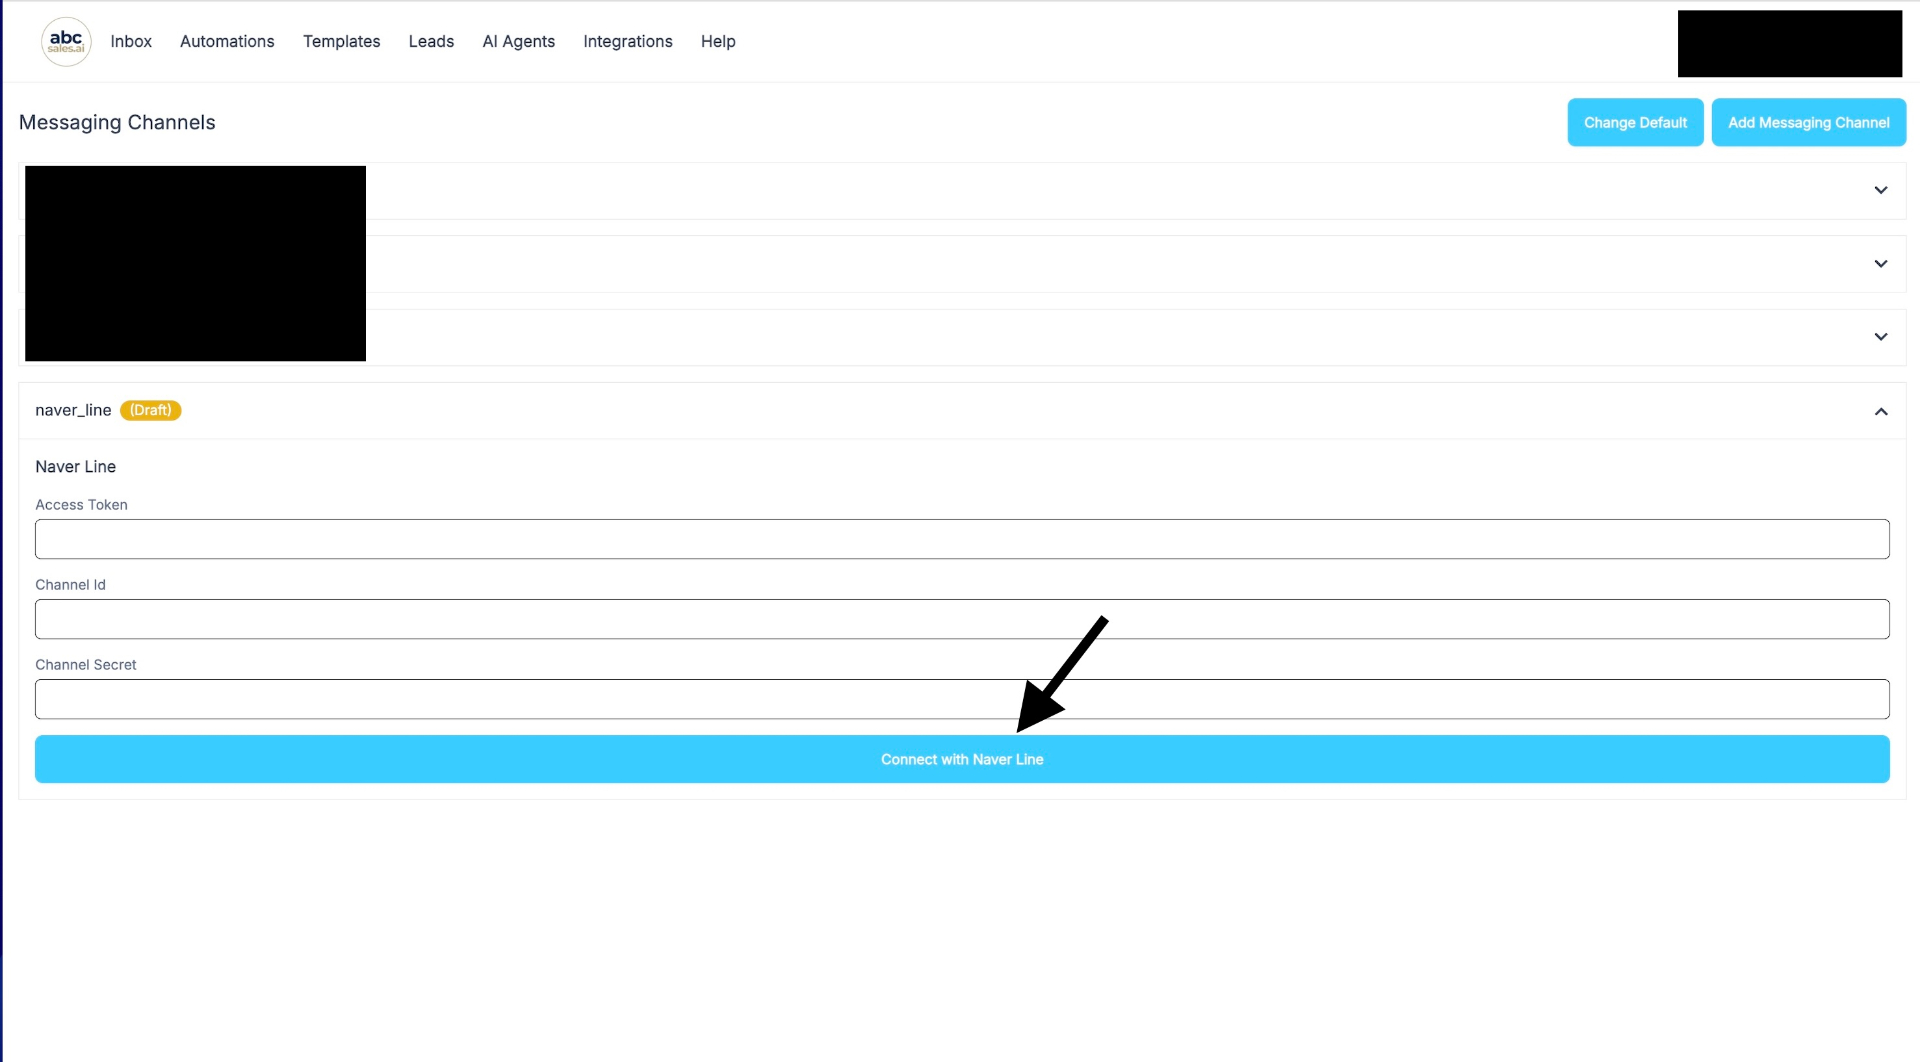
Enter your Access Token, Channel ID, and Channel Secret
You'll see the "naver_line" connection form with these fields:
- Access Token - Paste your Channel Access Token
- Channel Id - Paste your Channel ID
- Channel Secret - Paste your Channel Secret
Step 4: Complete Connection
- Click the blue "Connect with Naver Line" button
- Wait for the connection to be established
- You should see a success message
- Your LINE Official Account is now connected!
Part I: Set Up Your LINE Profile
Make your LINE Official Account look professional!
Step 1: Access Profile Settings
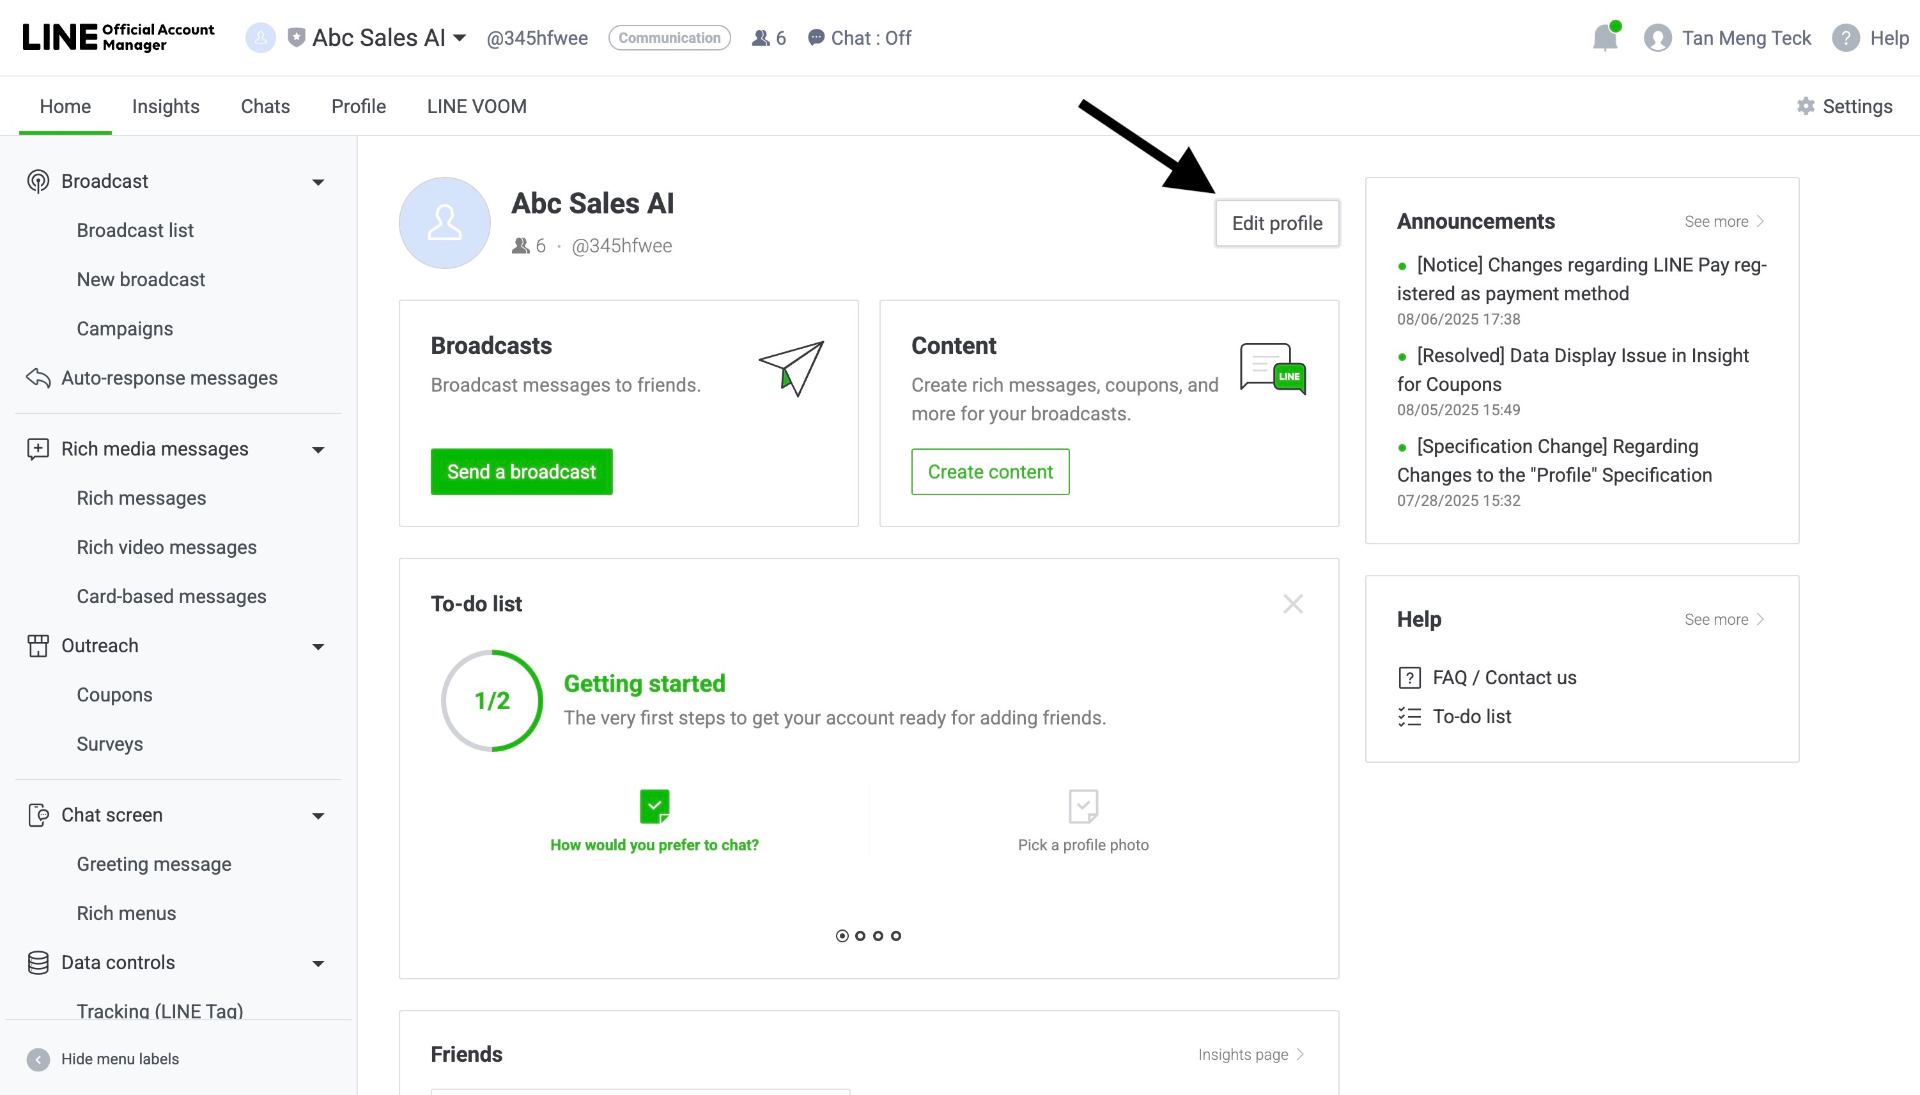
Click "Edit profile" to customize your account
- In LINE Official Account Manager, click "Edit profile" button (next to your account name)
- You'll see the "Profile page settings" page
Step 2: Upload Profile Photo
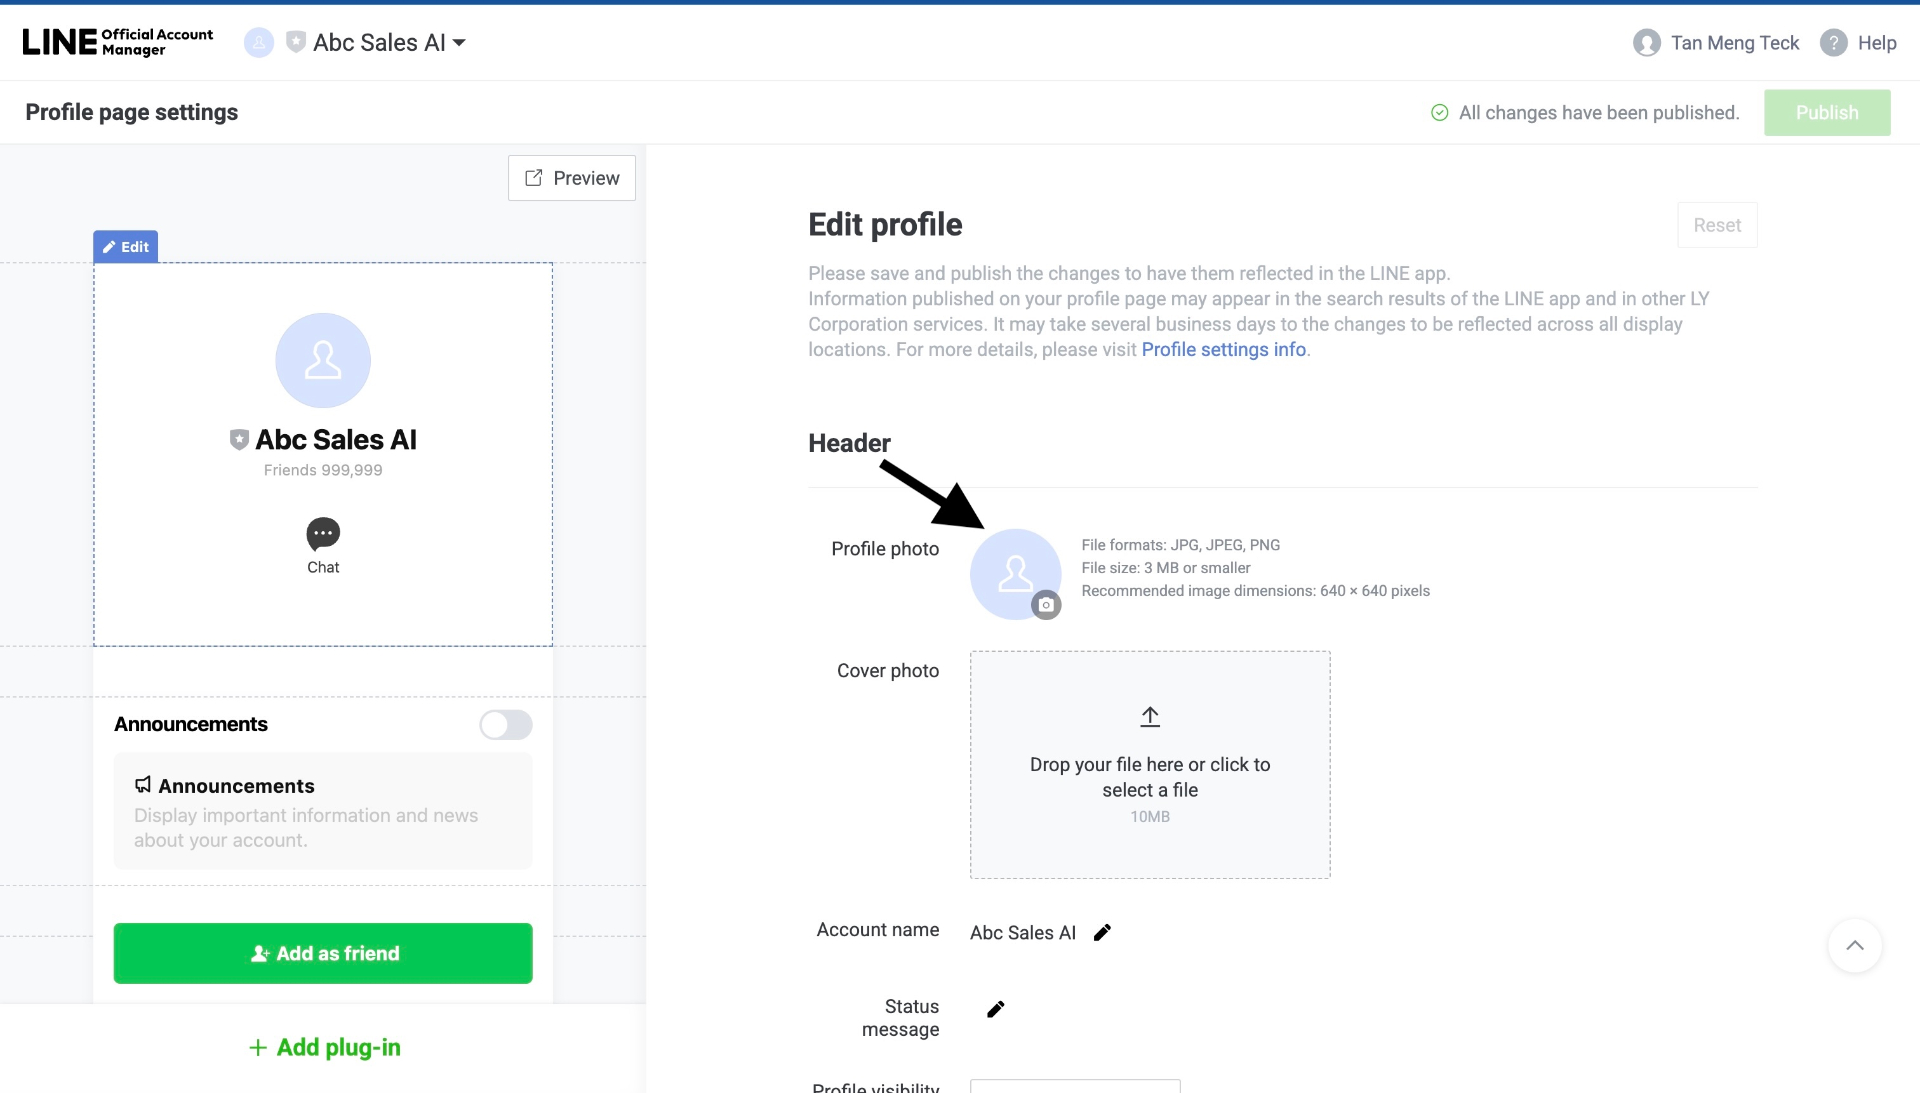
Profile page settings with photo requirements
Profile photo requirements:
- File formats: JPG, JPEG, PNG
- File size: 3 MB or smaller
- Recommended dimensions: 640 × 640 pixels
- Click on the profile photo area
- Upload your logo or brand image
- The photo will appear in chat and friend list
Step 3: Add Cover Photo (Optional)
- Drag and drop or click to upload
- Max size: 10MB
- This appears on your profile page
Step 4: Edit Account Details
- Account name - Your display name (already set)
- Status message - A short message shown under your name
- Profile visibility - Control who can see your profile
Step 5: Publish Changes
- Click "Publish" (top right) to save all changes
- Changes may take several business days to reflect across all LINE services
Part J: Monthly Plans & Payment (Optional)
LINE Official Account offers different pricing tiers based on message volume.
Available Plans

LINE Official Account pricing plans
- Communication: $0/month - 500 free messages/month - ❌ Cannot send additional messages
- Light: $50/month - 10,000 free messages/month - ❌ Cannot send additional messages
- Standard: $150/month - 40,000 free messages/month - ✅ Additional messages at $0.05/message
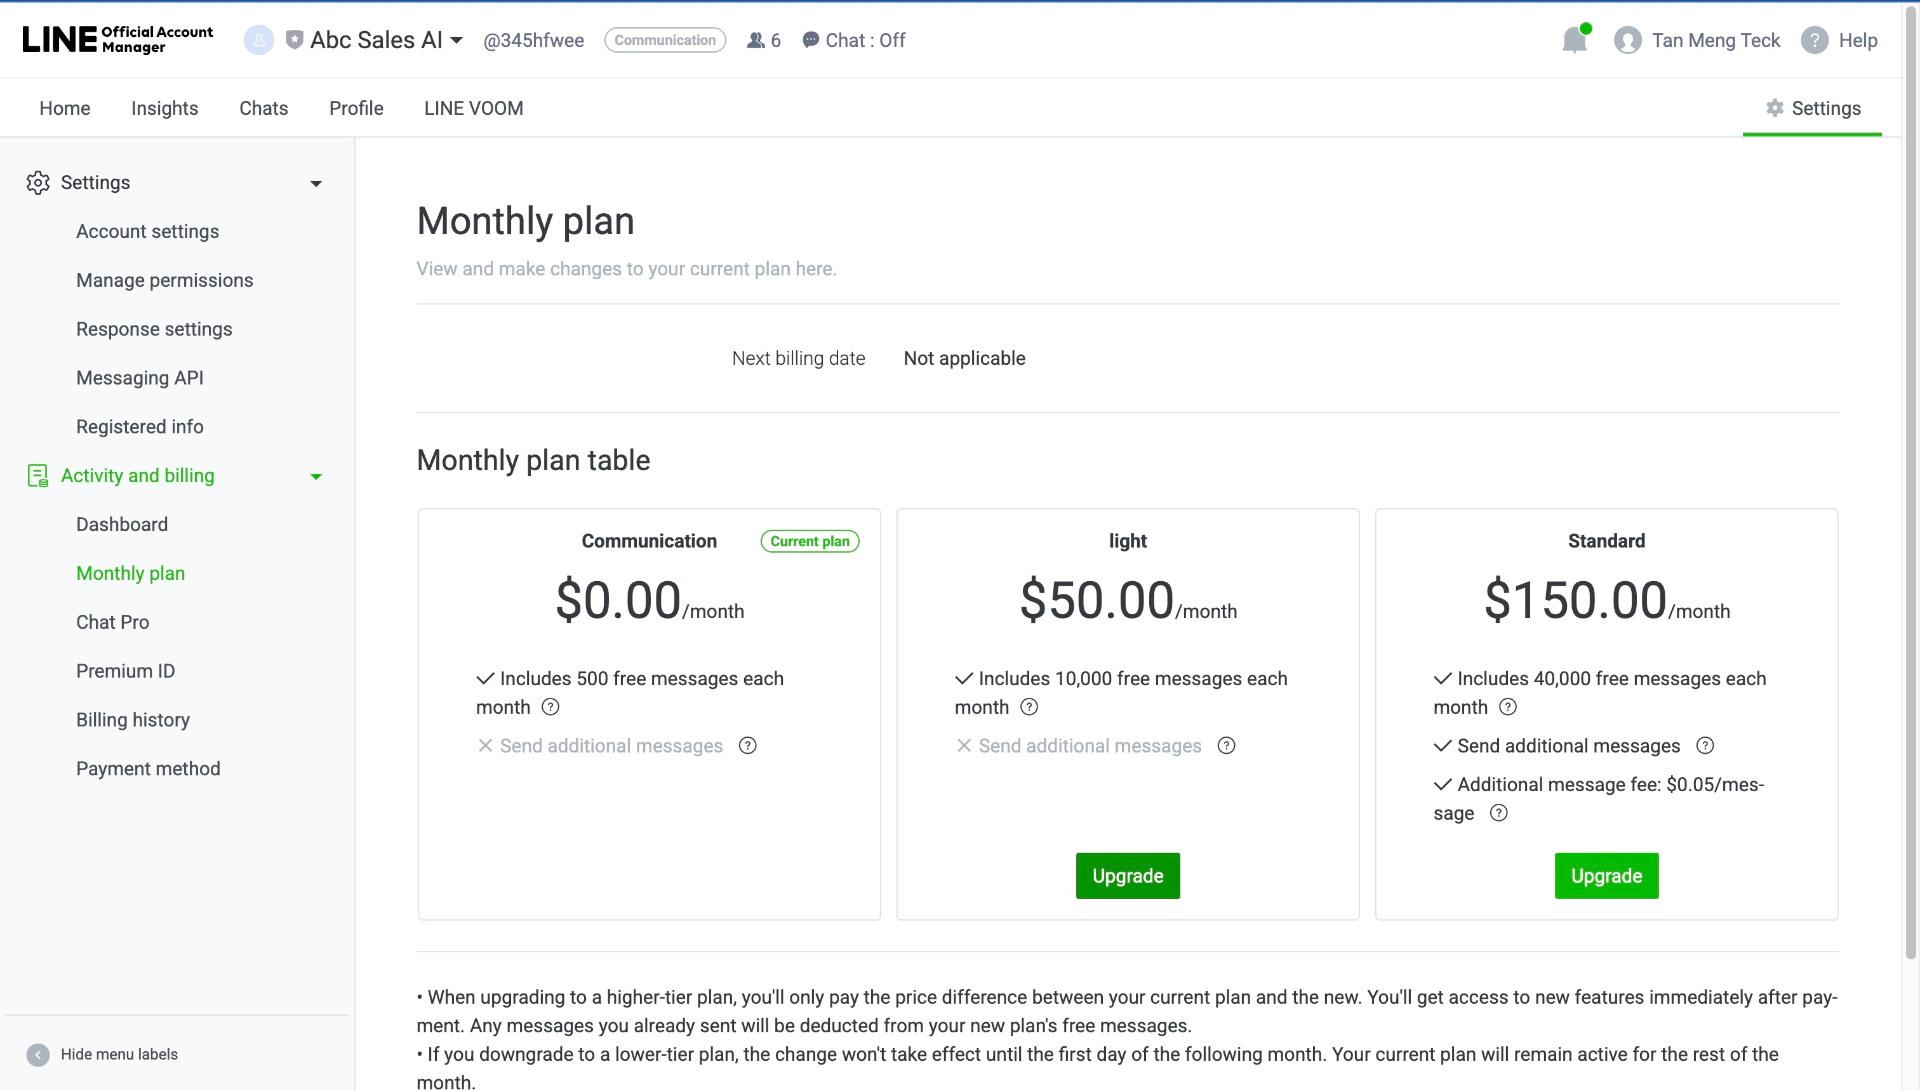
Upgrade your plan as your needs grow
Setting Up Payment Method
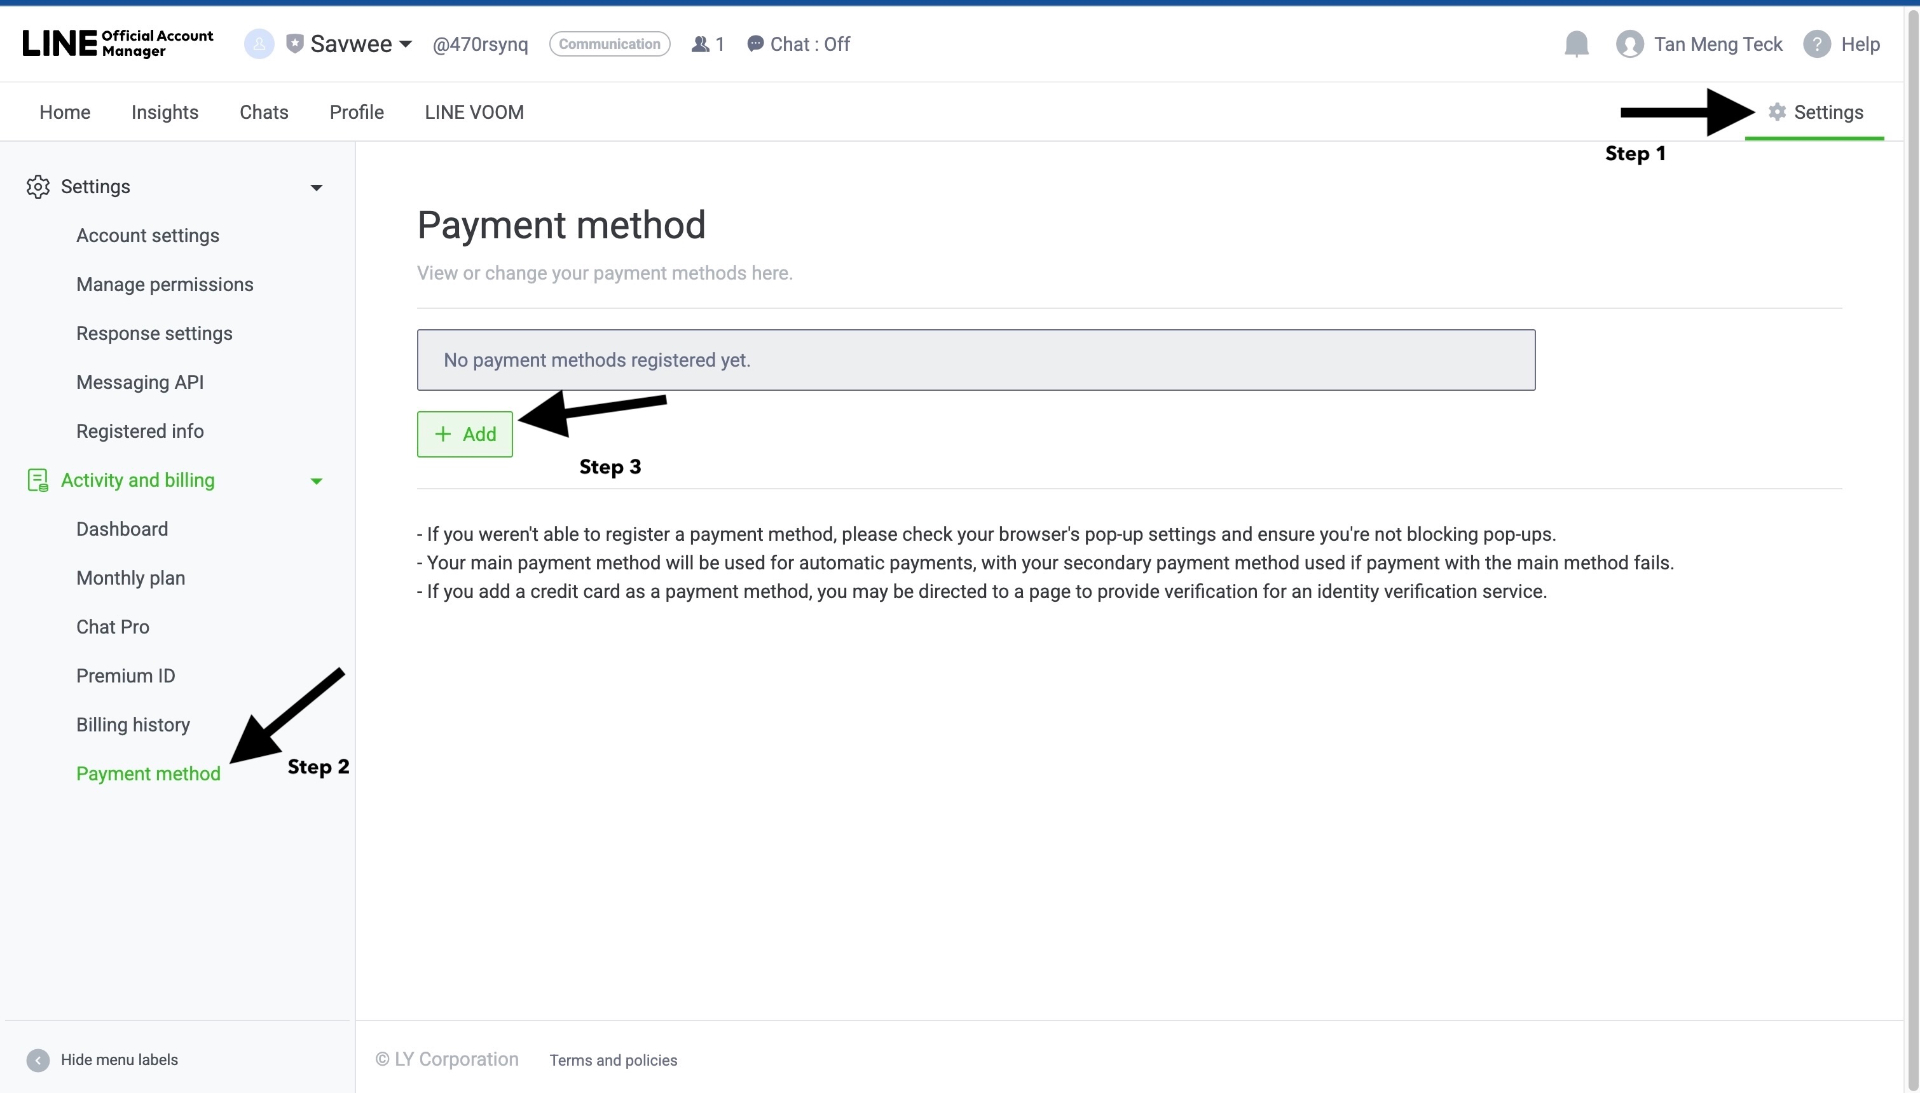
Add a payment method to upgrade your plan
If you need to upgrade your plan:
- Go to Settings in LINE Official Account Manager
- Under Activity and billing, click "Payment method"
- Click "+ Add" to add a payment method
- Enter your credit card details
- Your main payment method will be used for automatic payments
Part K: Grow Your LINE Audience
Once connected, use LINE's built-in tools to gain friends and grow your audience!
Access Gain Friends Tools
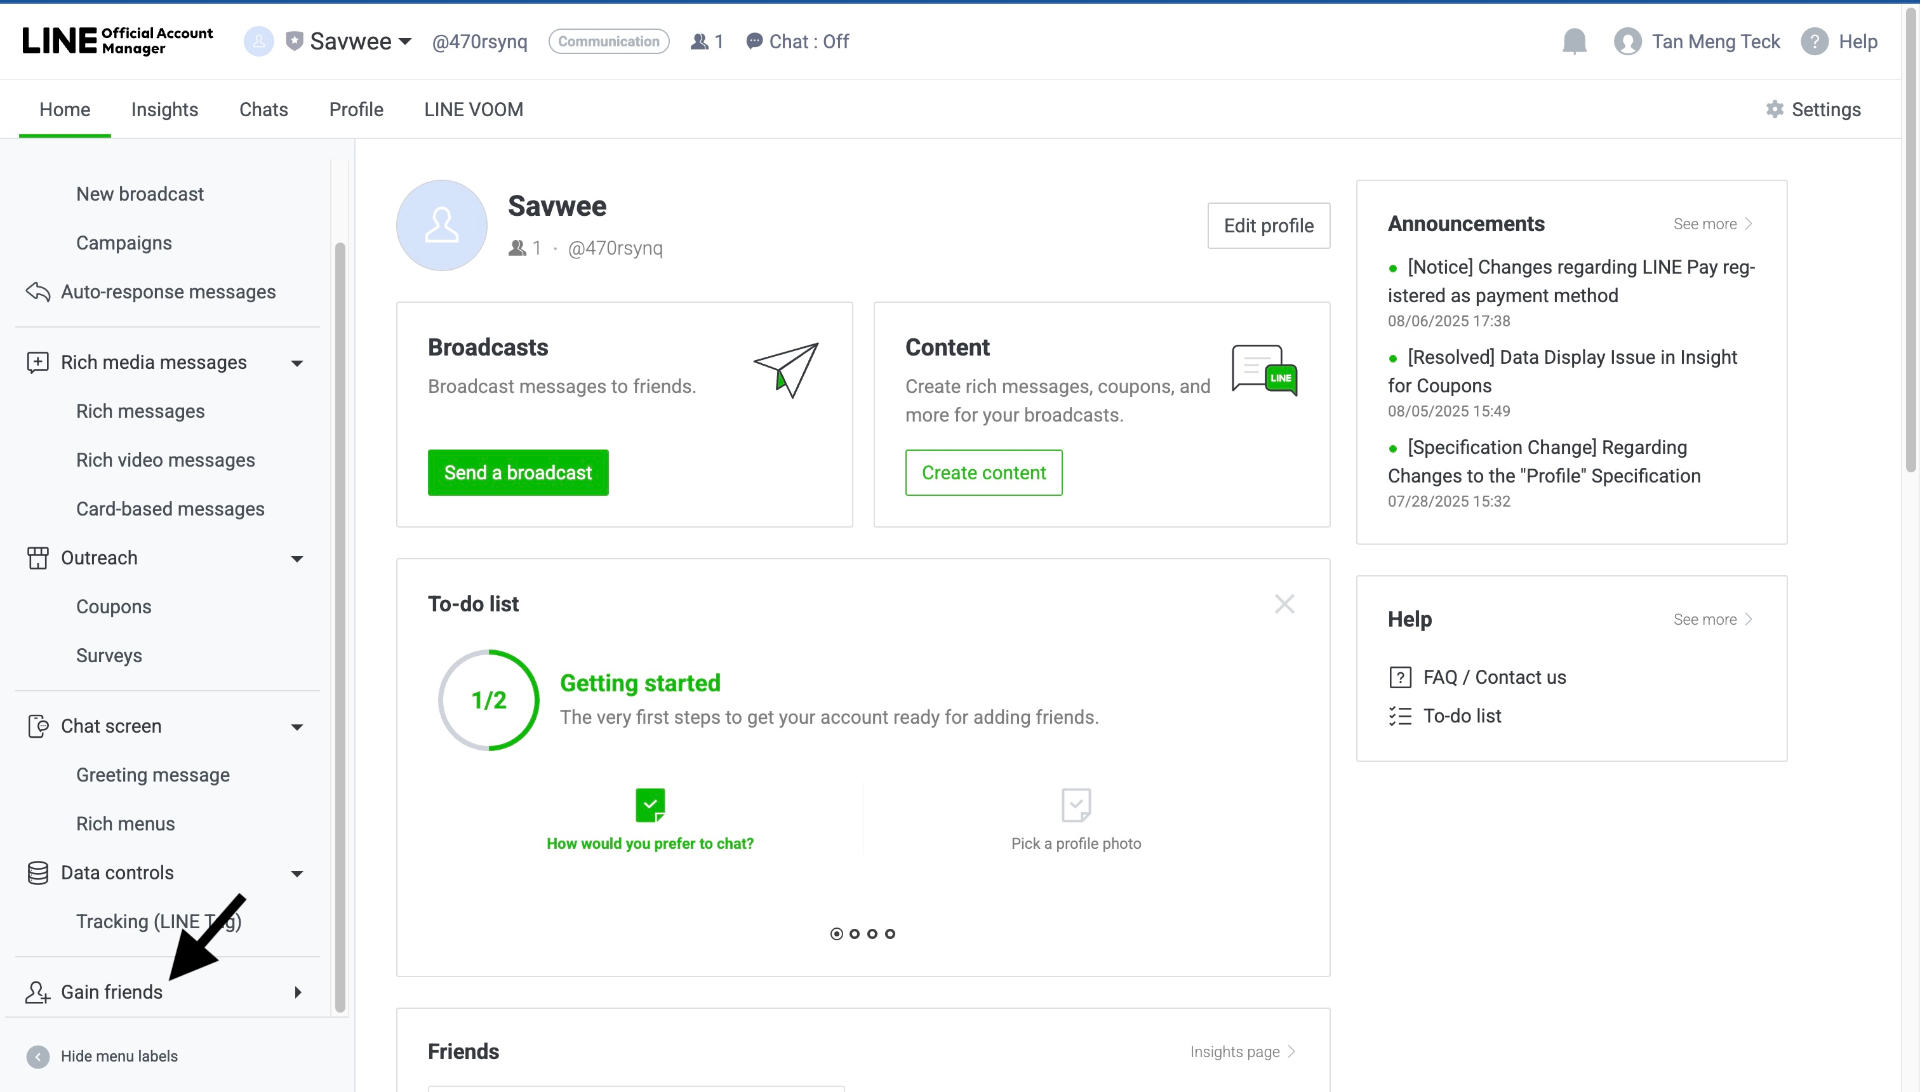
Gain friends section in the sidebar
- In the left sidebar, click "Gain friends"
- You'll see the growth funnel: Create account → Gain friends → Communicate → Gain fans → Increase sales!
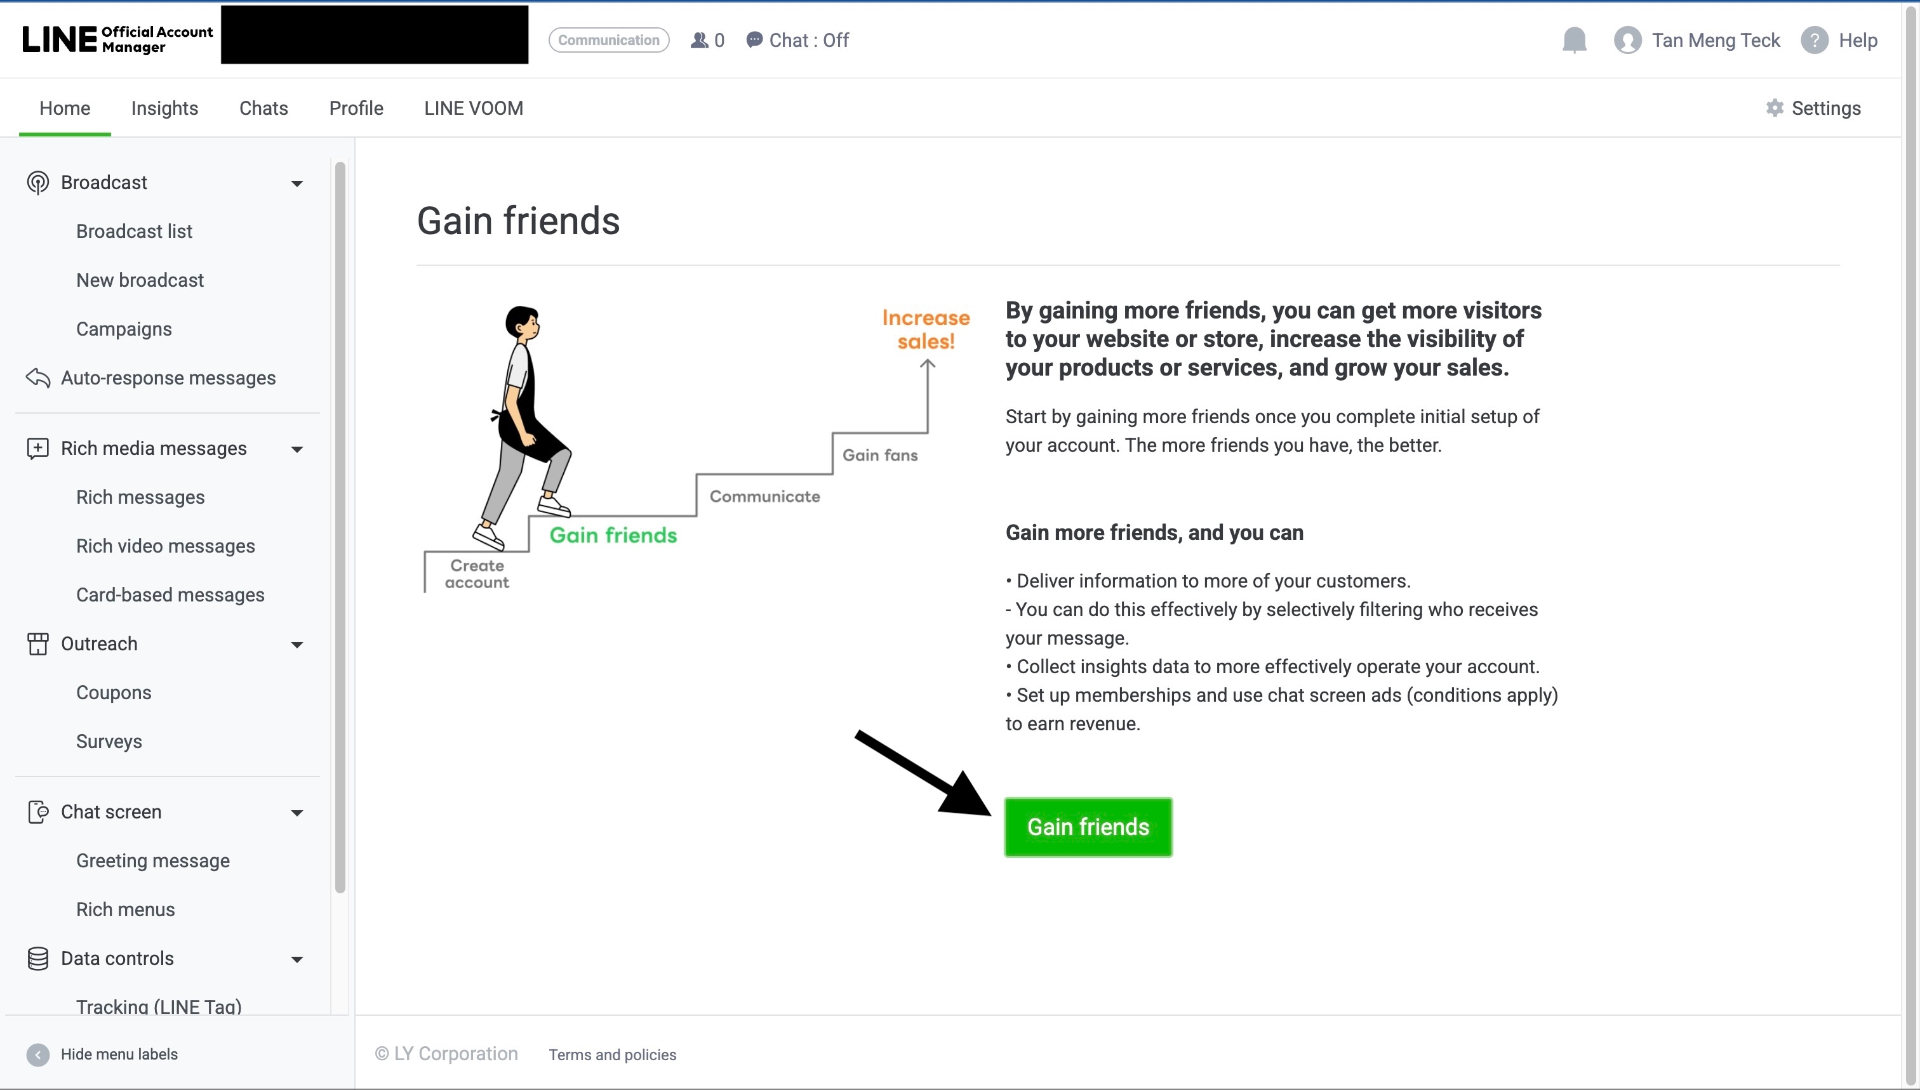
The LINE customer journey funnel
3 Keys for Gaining Friends
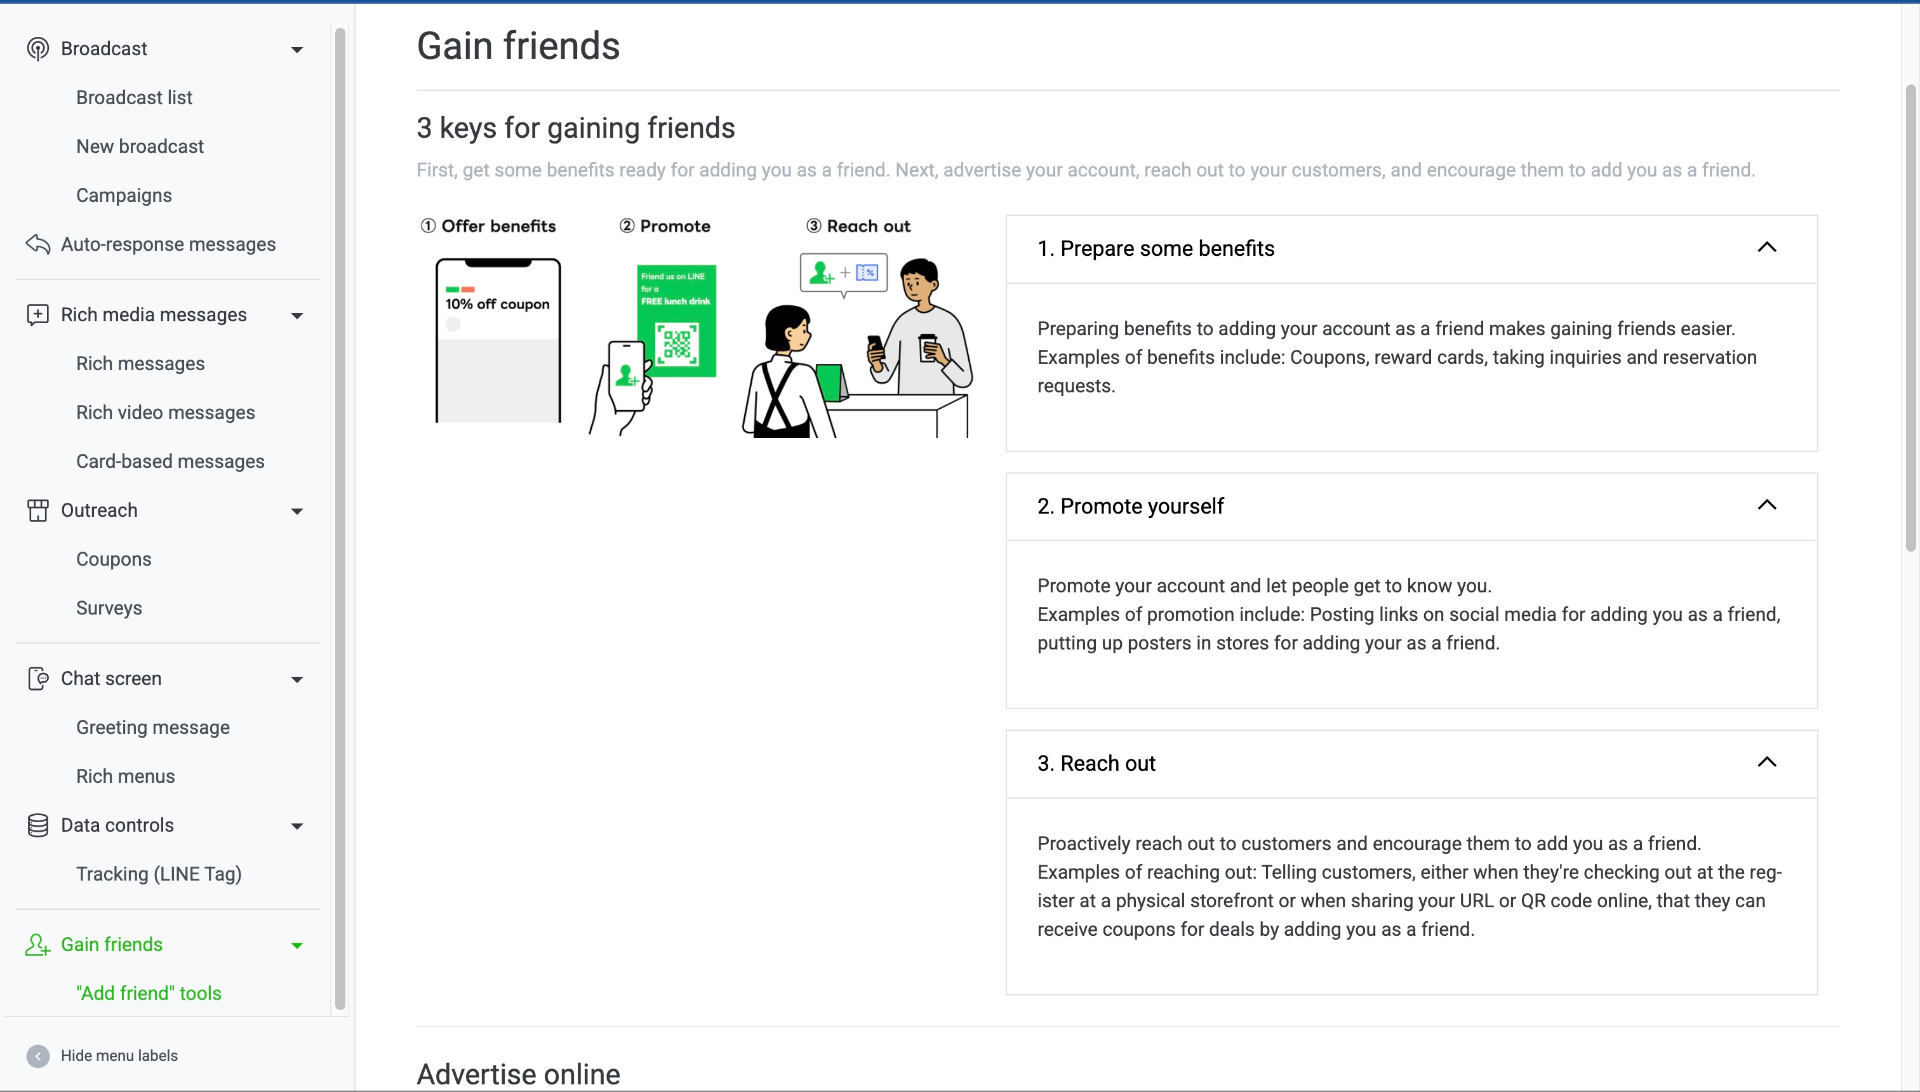
Three keys for gaining friends on LINE
1. Prepare Some Benefits
- Create coupons, reward cards, or special offers
- Examples: "10% off coupon", "Free lunch drink", reservation requests
2. Promote Yourself
- Post links on social media
- Put up posters in stores for adding you as a friend
- Announce on your website and emails
3. Reach Out
- Tell customers at checkout to add you
- Share your URL or QR code online
- Offer coupons for adding you as a friend
"Add Friend" Tools
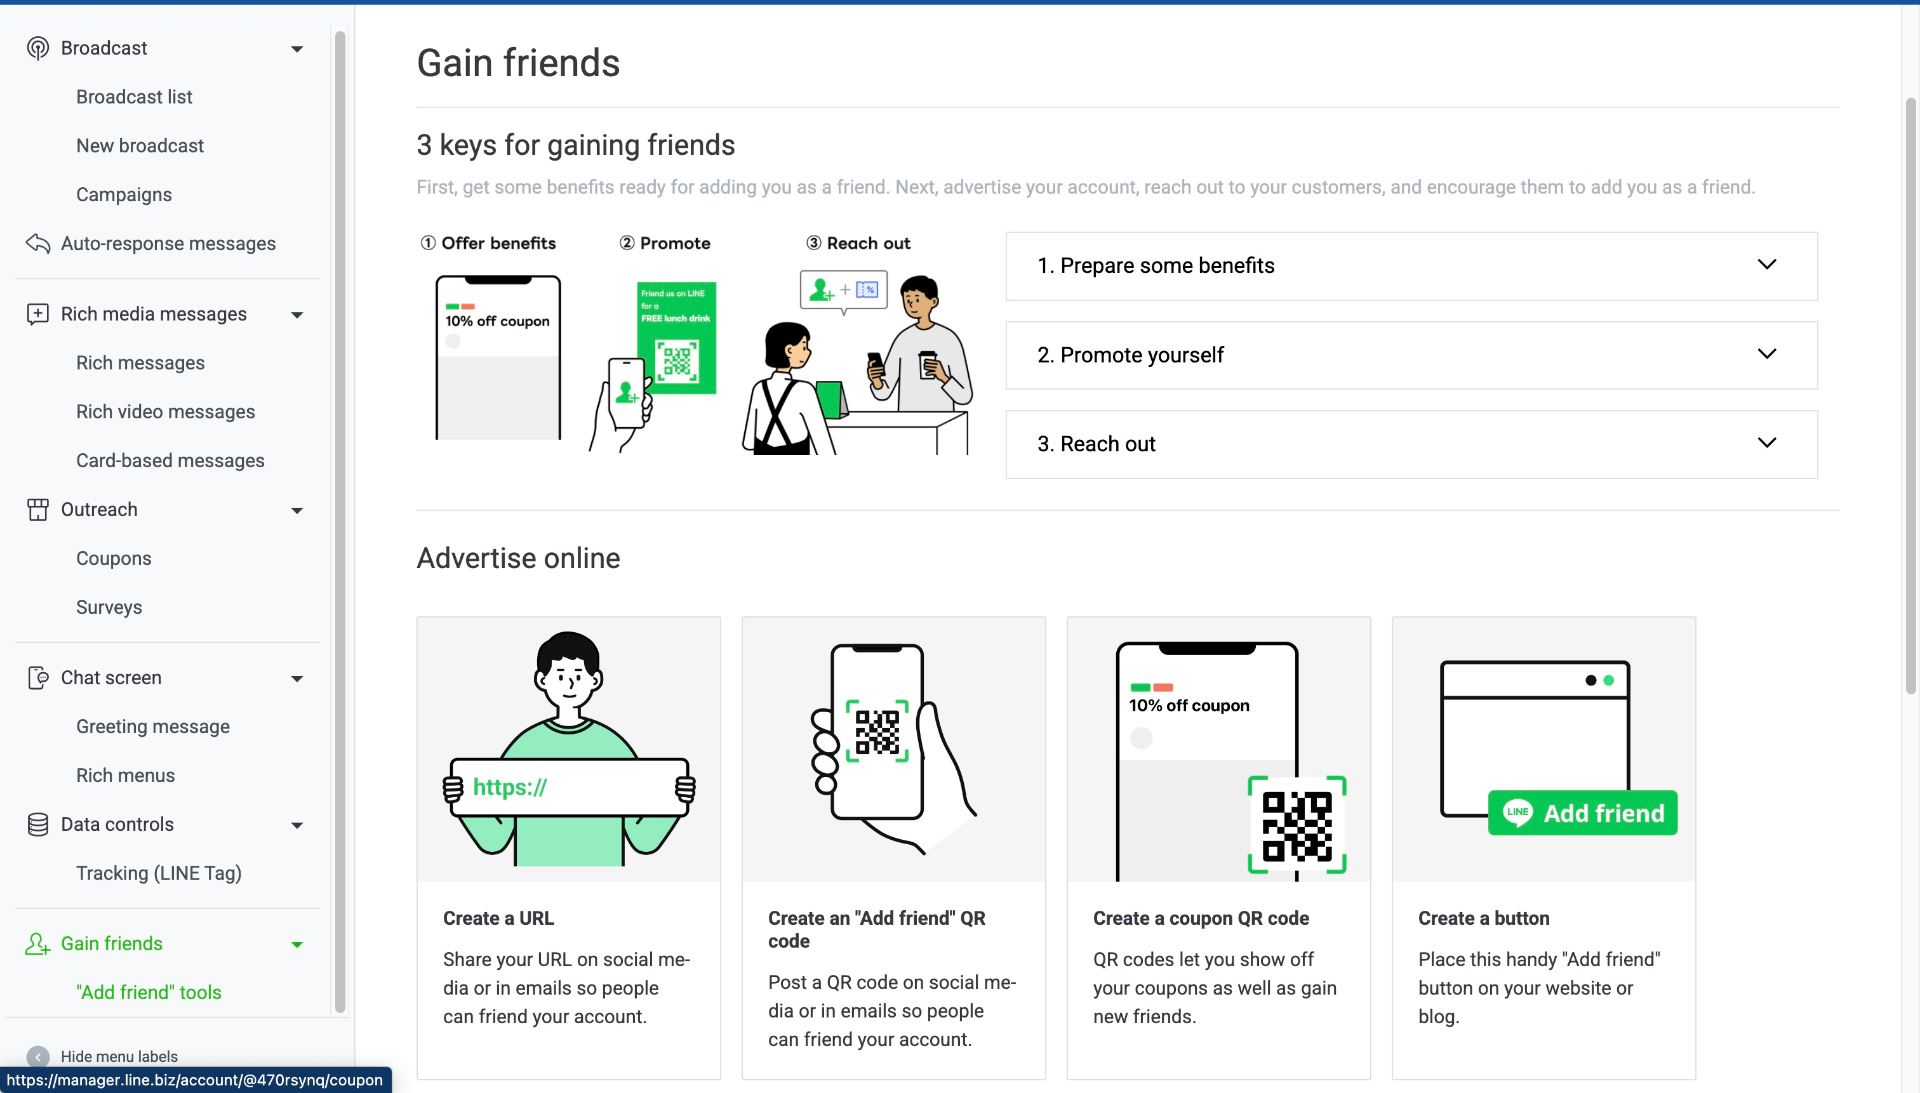
Tools to help people add you as a friend
LINE provides several tools to help people find you:
- Create a URL: Get a short link like \
https://lin.ee/IA7MqSs\to share on social media and emails - Create "Add friend" QR code: Post QR codes on social media or emails for easy friending
- Create coupon QR code: QR codes that show off your coupons and gain new friends
- Create a button: "Add friend" button to place on your website or blog
Create a Shareable URL
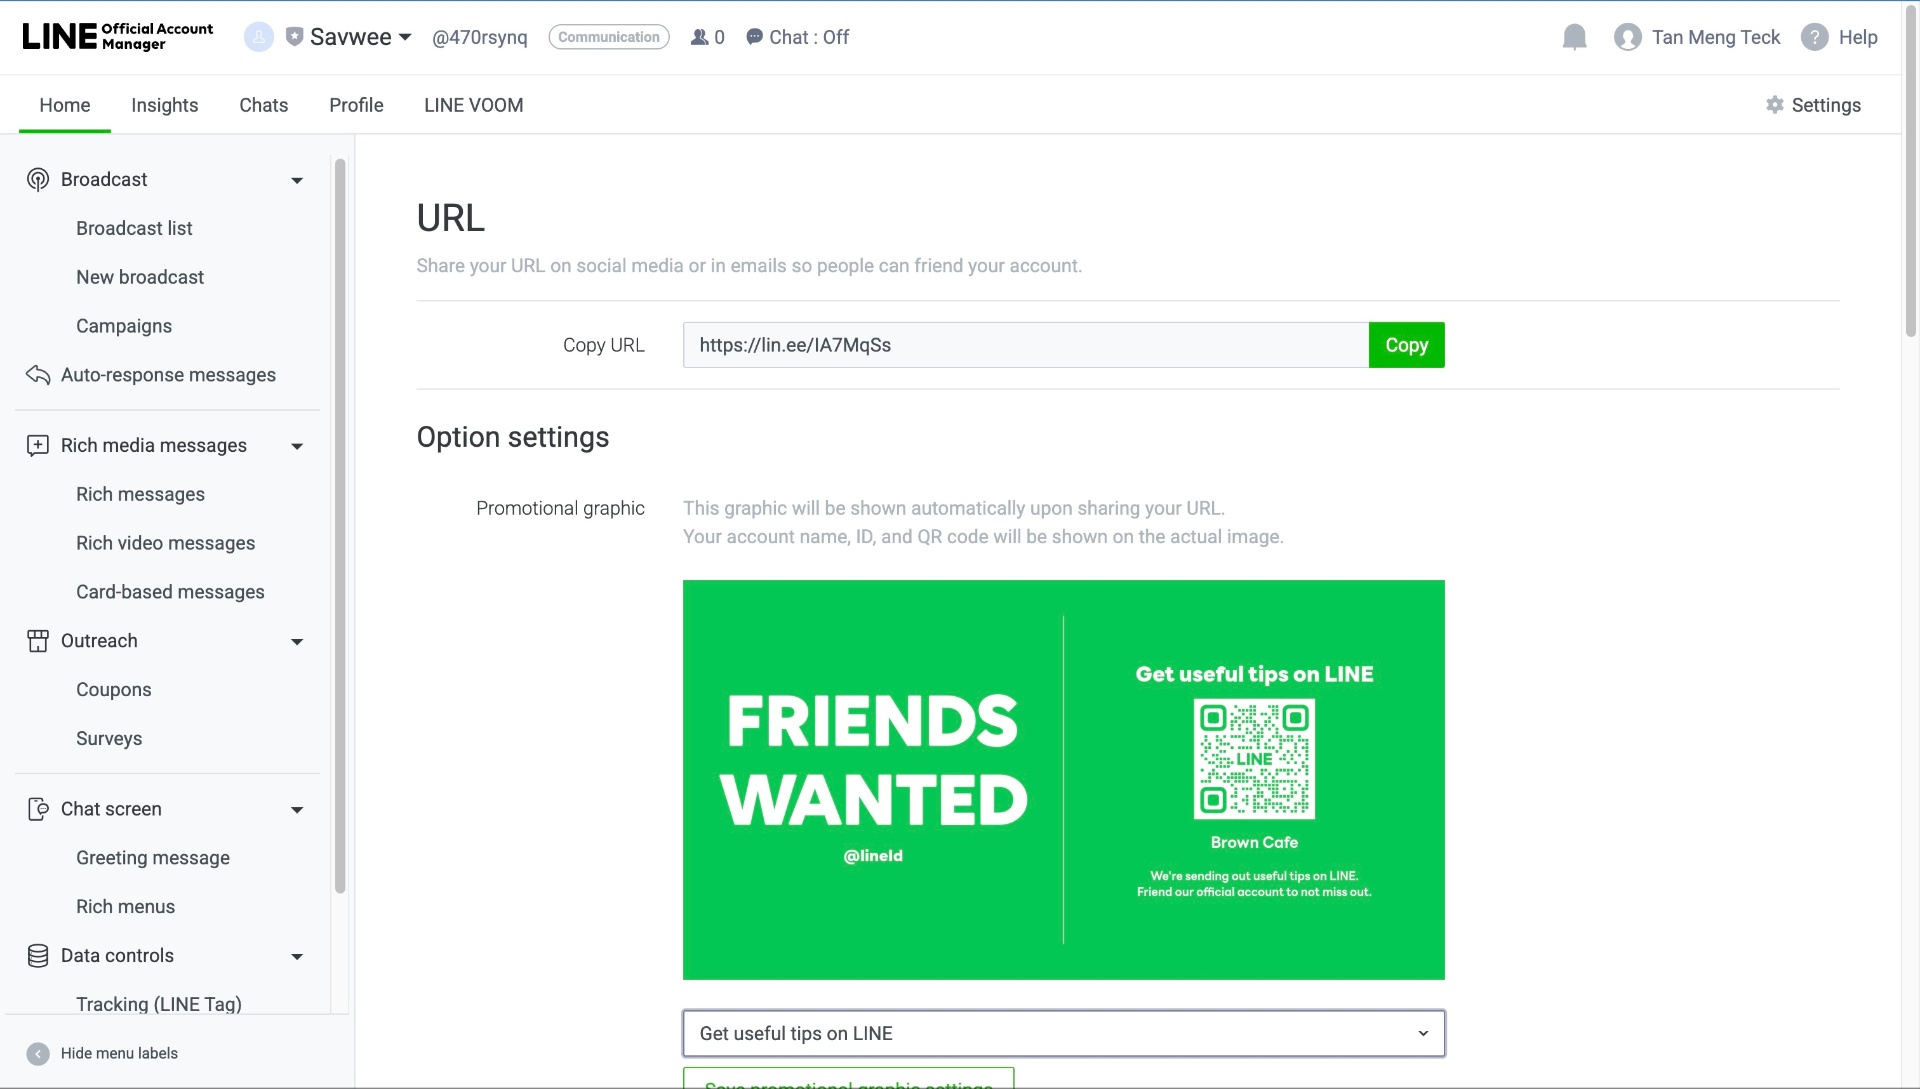
Create a shareable URL for your LINE account
- In LINE Official Account Manager, go to Gain friends > "Add friend" tools
- Find the URL section
- Copy your unique URL (e.g., \
https://lin.ee/IA7MqSs\) - Share on social media, emails, and marketing materials
Create & Download QR Code
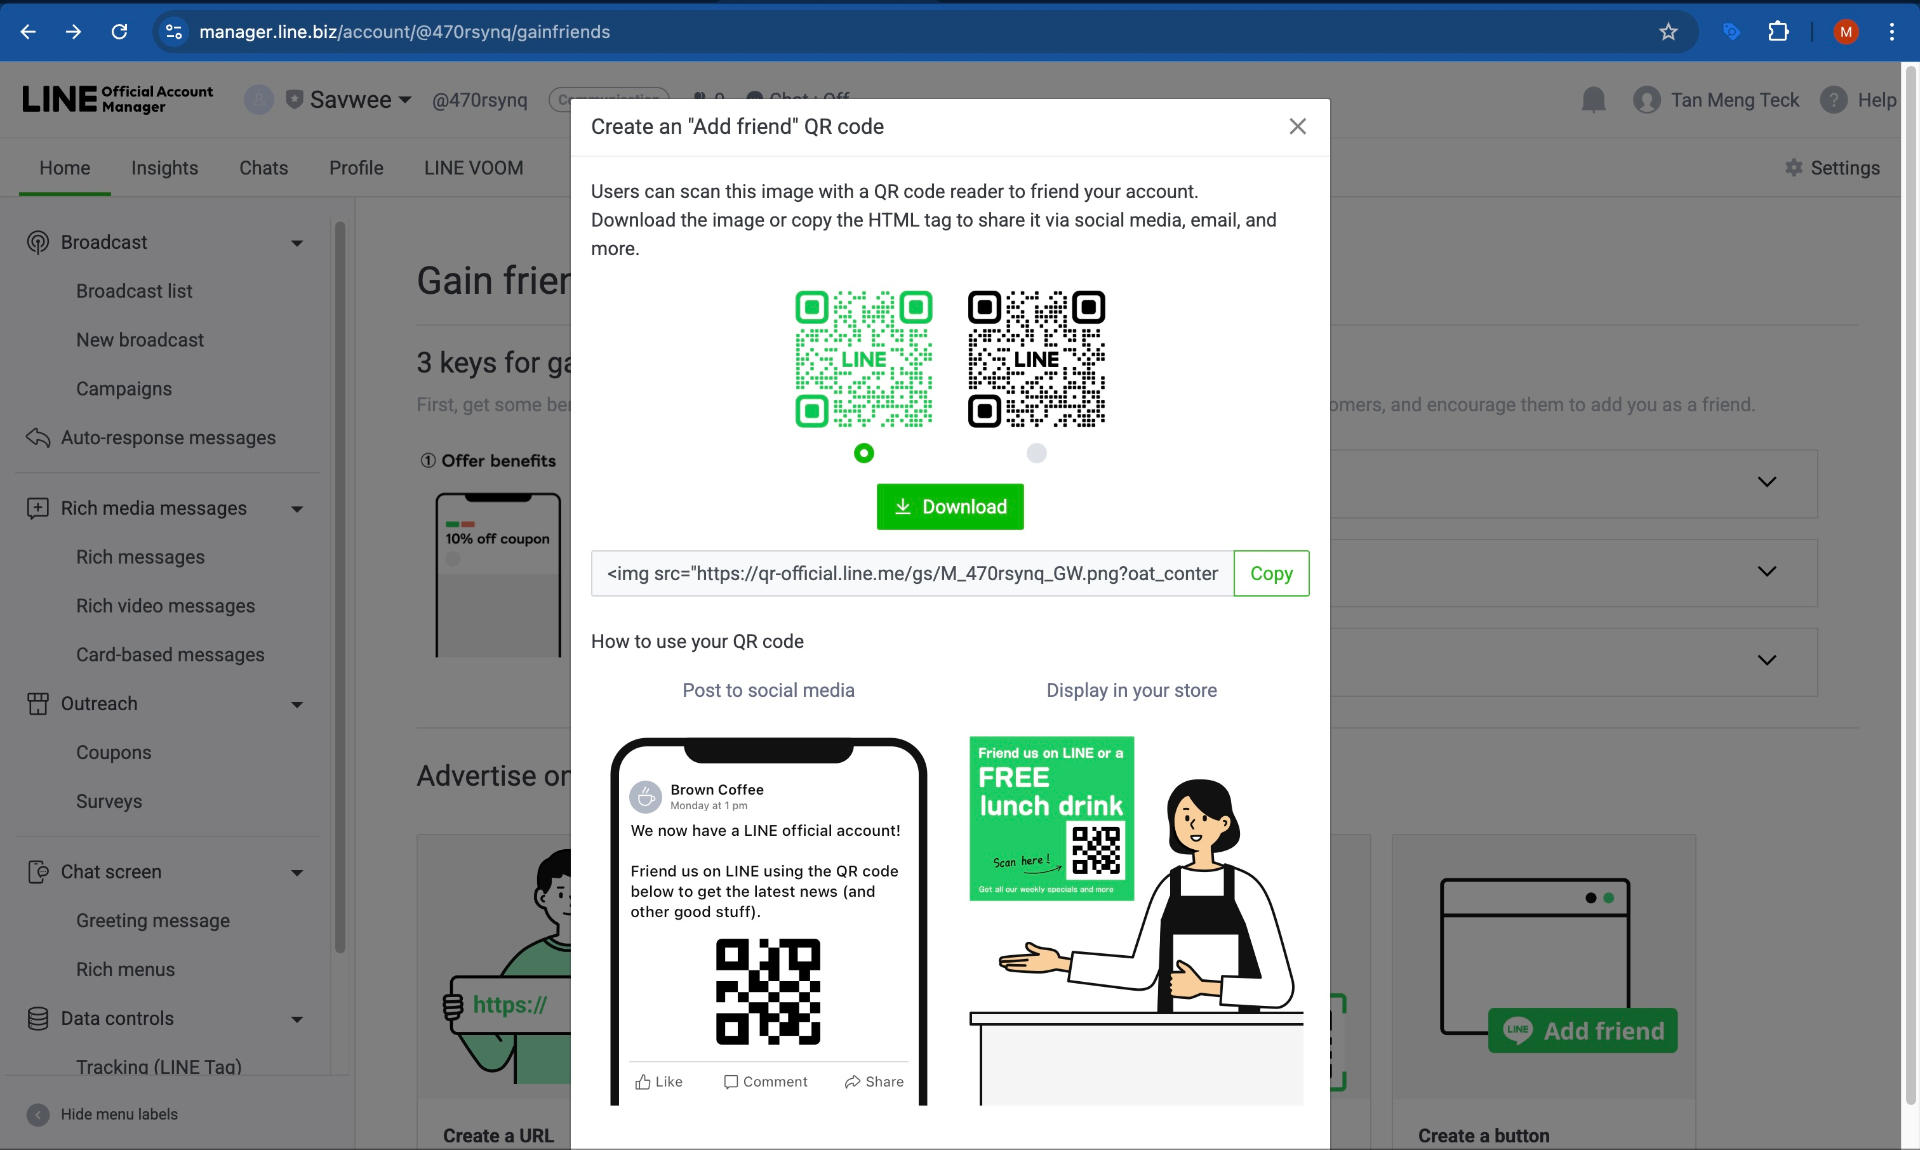
Download your "Add friend" QR code
- Click "Create an 'Add friend' QR code"
- Choose your QR code style (with or without LINE logo)
- Click "Download" to save the image
- Or copy the HTML code: \
<img src="https://qr-official.line.me/gs/M_xxxxx_GW.png">\
How to use your QR code:
- Post to social media - Share with a message like "Friend us on LINE!"
- Display in your store - Print and place at checkout counters
Testing Your Connection
Add Your Account as a Friend
- On your phone, open the LINE app
- Scan your QR code or click your URL
- Tap "Add as friend"
Send a Test Message
- Send a message like "Hello"
- Check your ABC Sales AI inbox - the message should appear!
Assign an AI Agent
- In ABC Sales AI, go to your LINE channel settings
- Assign an AI agent to handle LINE conversations
- Test by sending another message - AI should respond!
Best Practices for LINE
Message Format
- Use LINE-specific stickers and rich messages
- Keep messages concise - LINE users prefer short exchanges
- Consider time zones for your target market
Unique LINE Features
- Flex Messages - Create interactive, customizable layouts
- Rich Menus - Add a menu at the bottom of the chat
- Stickers - Use official LINE stickers for engagement
Market-Specific Tips
- 🇹🇼 Taiwan: Formal language preferred for business
- 🇹🇭 Thailand: Stickers and emojis are very popular
- 🇯🇵 Japan: Highly polite language expected
- 🇰🇷 Korea: Fast response times expected
Troubleshooting
- Messages not appearing in ABC Sales AI: Check webhook URL is correct and "Webhooks" toggle is ON in Response Settings
- AI not responding: Verify auto-reply AND greeting messages are disabled
- Connection failed: Double-check Channel ID, Channel Secret, and Access Token
- Duplicate responses: Disable LINE's built-in auto-reply and greeting messages in Response Settings
- Webhook verification failed: Ensure ABC Sales AI is connected first, then verify webhook
- Can't add payment method: Check browser pop-up settings